Evening all,
I have had a search through the old and new forum on here and gleaned quite a bit of info. I am putting together a small 4mm narrow gauge layout, just to dip my toe in the water so-to-speak. Having really struggled to come to terms with 009 for 1ft 11.75 inch gauge, I have decided to have a bash at the scale equivalent - 7.83mm. Before I go too far with Templot and the track plan, I am just seeking some confirmation that I have things set up right.
The layout will be based on Ffestiniog practice, but won't be an FR location.
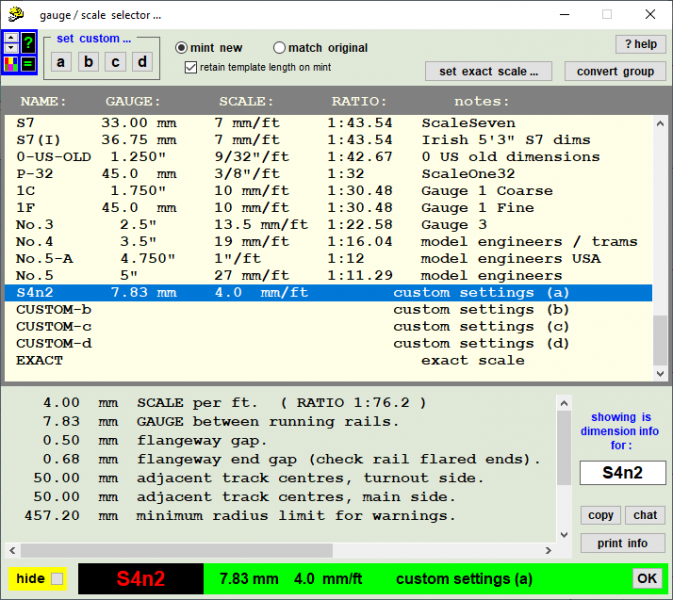
View attachment 984 These are the settings I have come up with for the gauge/scale. I am working on the premise of 4mm:1 foot scale, with a track gauge of 7.83mm, based on 2FS standards.
View attachment 985
Rail settings
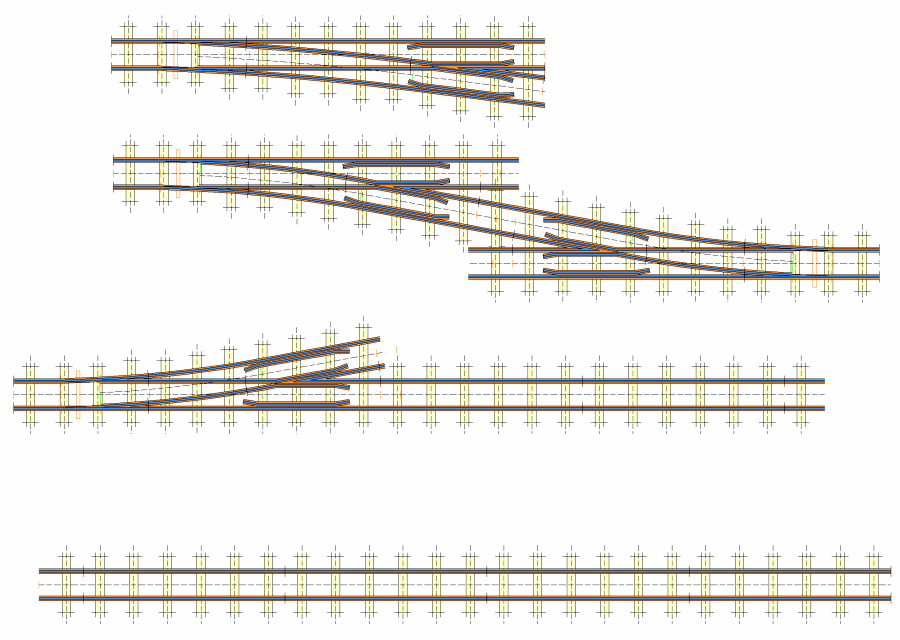
View attachment 986
Sleeper settings - not sure if the sleepers should be spaced a bit further apart, and they seem to be overlapping a bit around the middle three sleepers in the turnout?
Can anyone see is there anything I have got wrong, mis-understood or simply missed, that I also need to change?
Thanks in advance.
Rich
Hi Rich
There aren't many of us about using this scale/gauge! My catalyst for this was seeing Paul Holmes' Borth-y-Gest in Railway Modeller December 2004. If you're not already aware of that layout, it's well worth tracking down a copy of the article. Paul Holmes has shifted up a scale more recently, he's still quite active on the Facebook 'Narrow Gauge Railway Modelling' group. Incidentally, a name for this scale has been suggested as S4n2, although I can't remember where that came from. The 'n2' is standard for 2ft-ish narrow gauge, the S4 may come from the fact that the late Lyndon Emery formed the Narrow Gauge Study Group as an area group of the Scalefour Society.
Right - rail section data. As it looks like you're using flatbottom rails, for the standards you quote (the same as I use), you'll find Peco IL-1 rail fairly close to prototypical FR flatbottom (possibly era-specific though). It also has a huge advantage in that the rail foot won't need filing away for flangeways! The dimensions for that are:- head width 2.25", foot width 3.69" and height 4.8".
If you want bullhead rail, I use code 60 from the 3mm Society, with their chairs. Rail dimensions are width 2.19" and height 4.5".
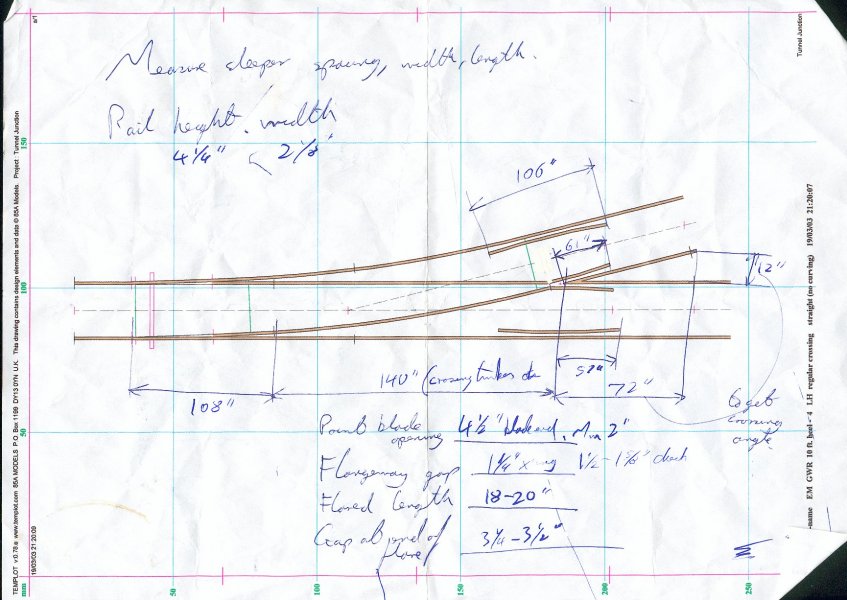
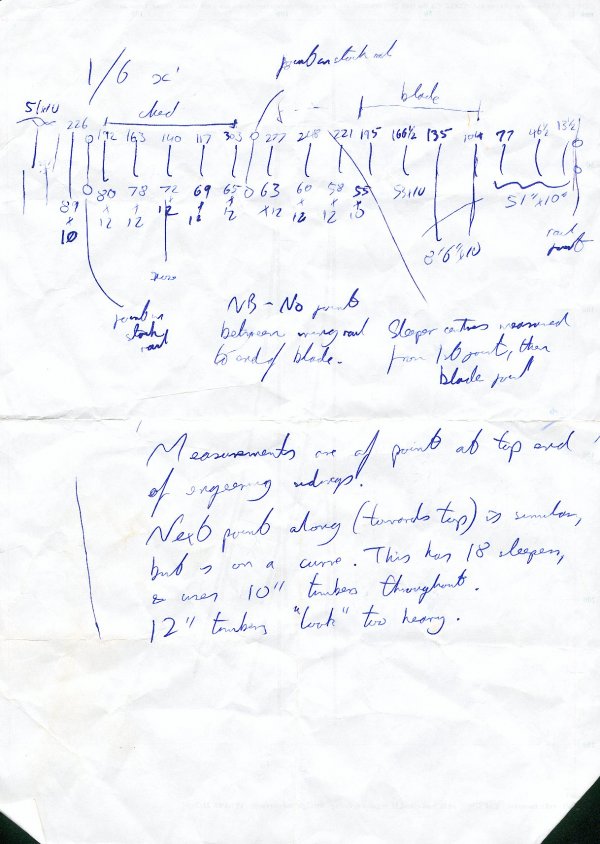
For timbering, I'm working on the basis that the FR once used standard gauge sleepers cut down, which means all sleepers and timbers will be 10" wide. I don't know if that's true for the period I'm now modelling - around 2000 - but it looks in proportion. I use C&L copper-clad sleepers, with the rail soldered directly to them. I've gone for plain track sleepers at 51" length (standard 8'6" sleeper cut in half!). It looks like I've gone for about 2'8" centres. On the turnout, just delete any overlapping timbers and shuffle the others about accordingly! (Make sure there's a timber under the crossing nose.)
You say you're working to 2FS standards, but you've set a flangeway gap of 0.67mm - it should be 0.5mm. Also attached (a lot of attachments!) is my equivalent screenshot. You will need to use wheels from the 2mm Scale Association - rolling stock wheels are drop-in but locos will need more work.
I made my own gauges (drawings attached), and use a 0.5mm feeler gauge as a flangeway gauge. I've also attached a drawing of the rail and wheel standards I use, with due credit to Paul Holmes. Note that roller gauges don't allow for gauge widening on curves, so keep them fairly large radius!
There are more model photos on my Flickr page within this Collection:-
https://www.flickr.com/photos/pjmarlow/collections/72157700083817292/ There's also my Ffestiniog Railway album, where some of the photos show details of the track without trains in the way!
https://www.flickr.com/photos/pjmarlow/sets/72157715510039867/
I hope all this is helpful, and hasn't put you off! The biggest problem is wheels for locos where the use of a lathe is more or less essential. Standard RTR wheels won't work without RTR flangeways, so you're really back where you started with 009 but less a little bit! A couple of the attachments show a square-on shot of 009 compared to S4n2.
Cheers,
Paul
 Search
.png") These are the settings I have come up with for the gauge/scale. I am working on the premise of 4mm:1 foot scale, with a track gauge of 7.83mm, based on 2FS standards.
These are the settings I have come up with for the gauge/scale. I am working on the premise of 4mm:1 foot scale, with a track gauge of 7.83mm, based on 2FS standards..png")
.png")
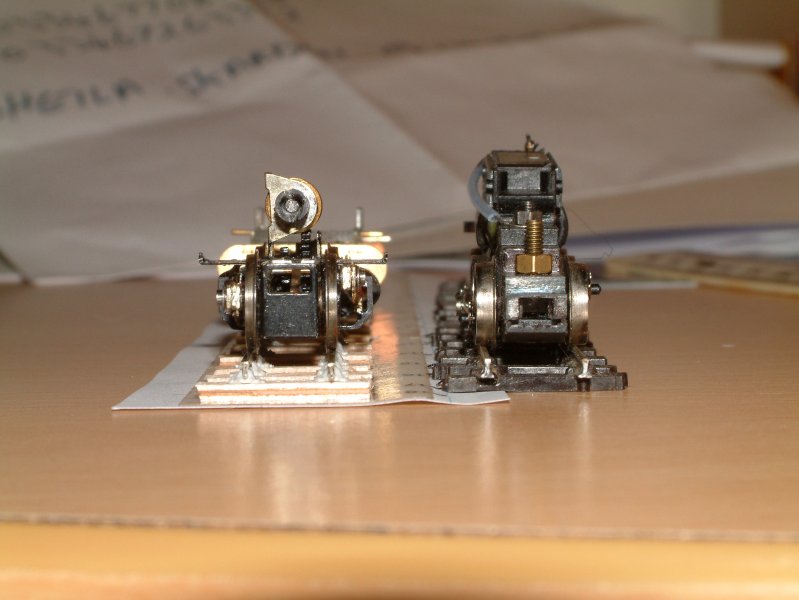
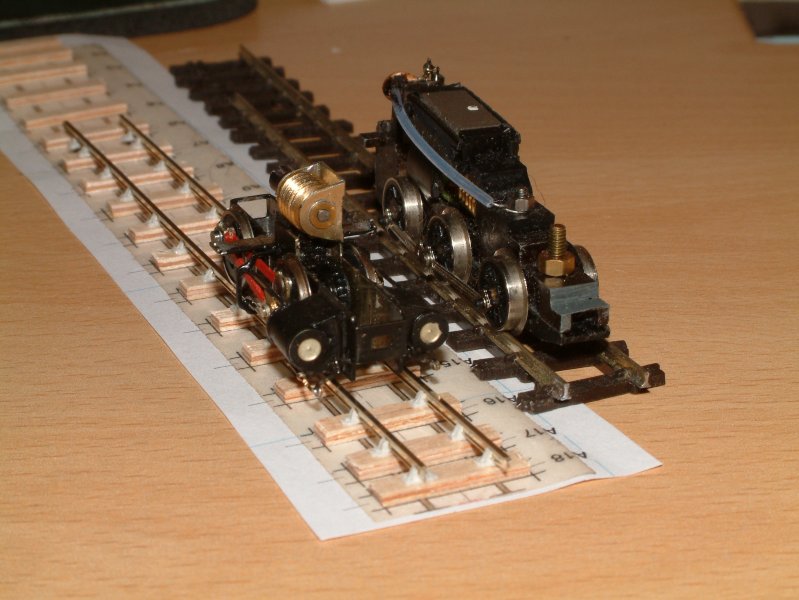

 The pictures really highlight the difference the scale wheels make to the look of the chassis - going to a preserved NG line comes as a bit of a shock when you are used to seeing RTR models.