 Search
Martin Wynne
Admin
- Location
- West of the Severn UK
- Info
- .
Enjoy using Templot?
 Thanks.
Please do not send requests for help direct to me via email.
Post your questions on the forum where everyone can see them and add
helpful replies.
@Lancastrian
Sometimes where we have tracks crossing on multiple levels a means is needed to indicate which track is on which level.
For tunnels, hidden sidings, etc., it is easy enough. The hidden tracks can have the timbers omitted, or be shown in marker colours.
Where tracks cross on a rail-over-rail overbridge it is not so simple. The lower level tracks may include pointwork for which we need to see the timbering, and the section below the bridge is likely to be shorter than a full template, so that changing the template marker colour wouldn't help.
Ian Allen mentioned this issue recently.
Hi Ian,
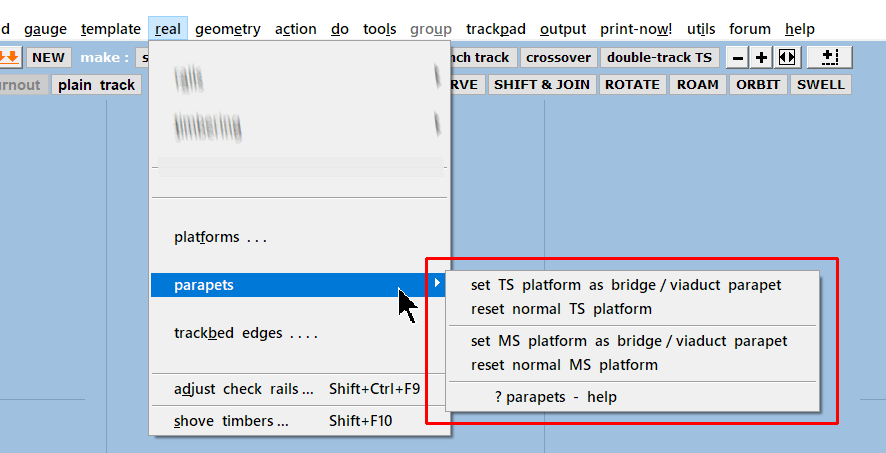
For such situations I suggest adding parapets to the upper tracks, which provide a visual indication of an overbridge:

Solid parapets may be purely symbolic of course, if the actual bridge will have railings or the tracks run between side girders.
The parapets function is a simple kludge using modified platforms, see:
https://85a.uk/templot/club/index.php?threads/viaduct-walls.110/post-1480
The position and length of the parapets can be adjusted in the same way as the platforms.
On the printed templates parapets appear with solid infill, but on the trackpad view they are outlines only -- I will look at adding a hatched infill to make them more prominent.
cheers,
Martin.
Sometimes where we have tracks crossing on multiple levels a means is needed to indicate which track is on which level.
For tunnels, hidden sidings, etc., it is easy enough. The hidden tracks can have the timbers omitted, or be shown in marker colours.
Where tracks cross on a rail-over-rail overbridge it is not so simple. The lower level tracks may include pointwork for which we need to see the timbering, and the section below the bridge is likely to be shorter than a full template, so that changing the template marker colour wouldn't help.
Ian Allen mentioned this issue recently.
Hi Ian,
For such situations I suggest adding parapets to the upper tracks, which provide a visual indication of an overbridge:
Solid parapets may be purely symbolic of course, if the actual bridge will have railings or the tracks run between side girders.
The parapets function is a simple kludge using modified platforms, see:
https://85a.uk/templot/club/index.php?threads/viaduct-walls.110/post-1480
The position and length of the parapets can be adjusted in the same way as the platforms.
On the printed templates parapets appear with solid infill, but on the trackpad view they are outlines only -- I will look at adding a hatched infill to make them more prominent.
cheers,
Martin.
message ref: 4545