| This tutorial is over 20 years old, it is completely out of date, and is shown here for interest only. Please refer to the Templot Companion User Guide for current information. |
Page 7. Click here to skip this page : next page
screen 50:
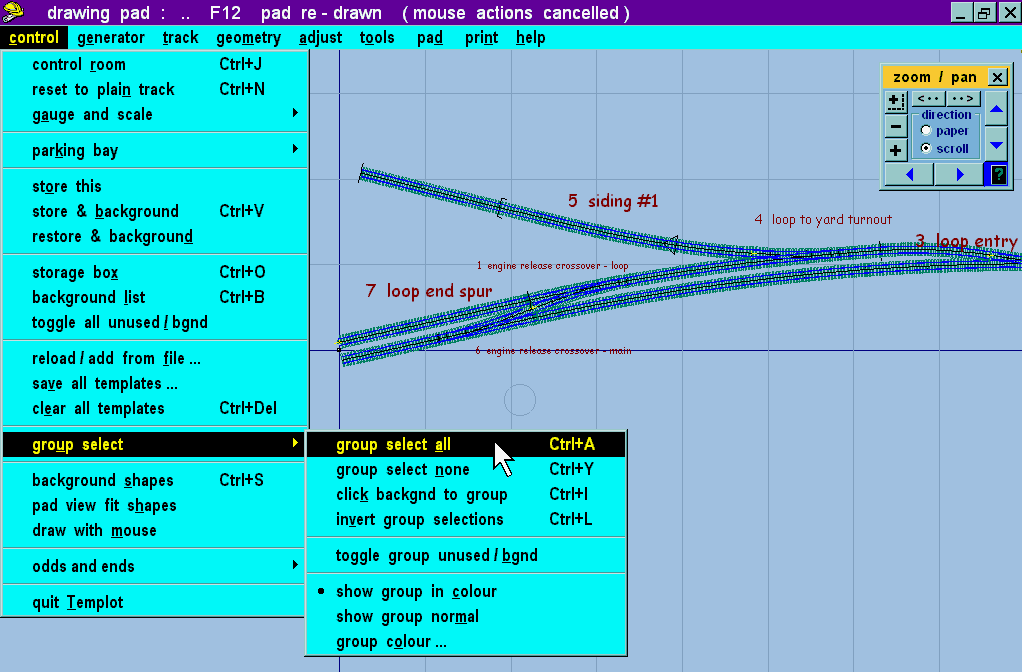
Screen 50. Now we notice that the platform buffer-stops are overlapping the drawing datum, which will be untidy when printed, and the whole plan needs re-positioning.
Click the control > group select > group select all menu item to create a group of background templates which in this case comprises all of them.
screen 51:
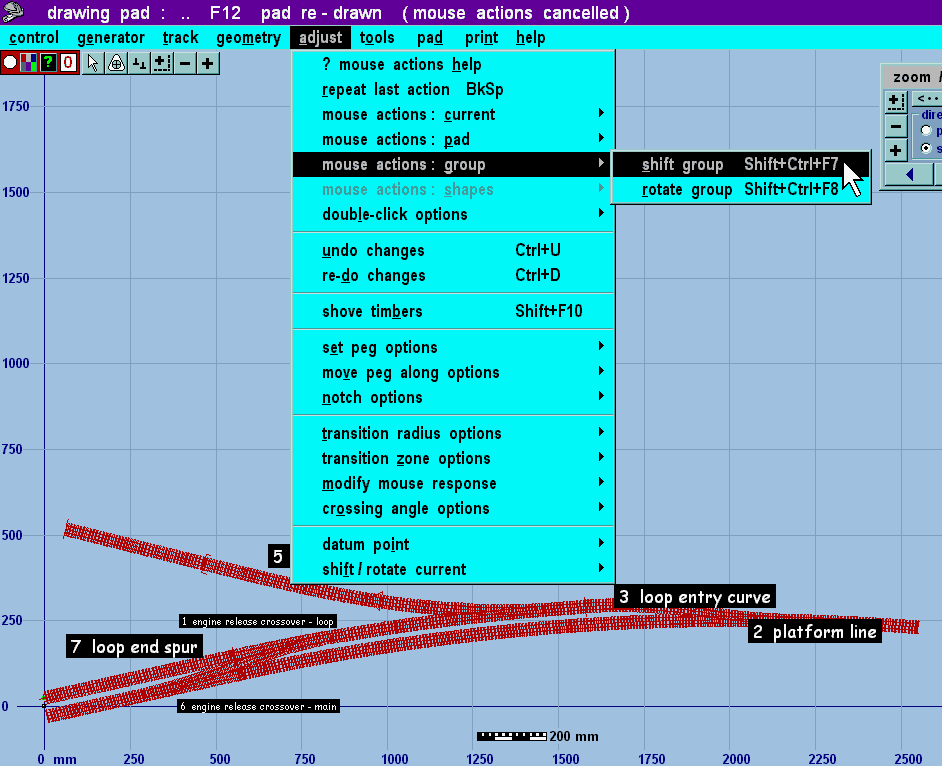
They are all re-drawn in the group colour. Press SHIFT+CTRL-F7 for the shift group mouse action, or click this on the menus as shown in screen 51.
screen 52:
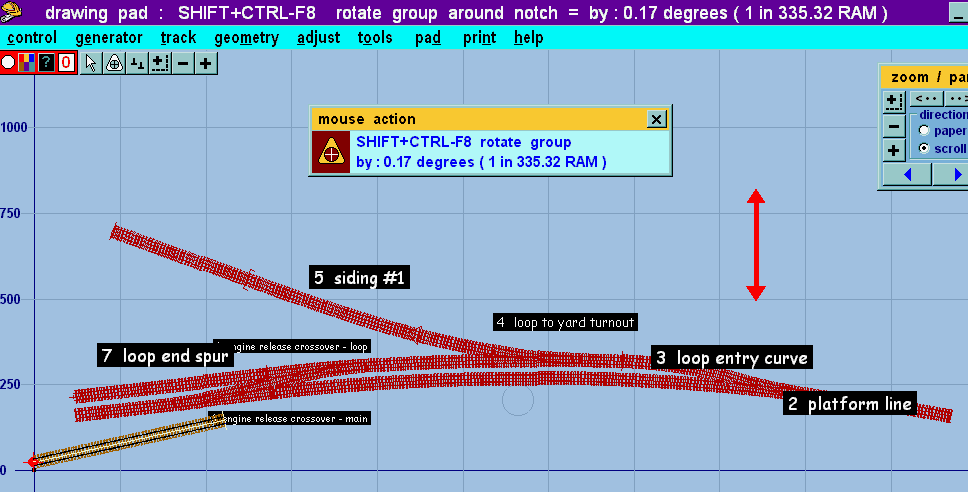
Move them about as required. There is a great deal of re-calculation required, so on slower systems you will need to move the mouse slowly and wait for Templot to catch up. Notice that the current template appears while you are doing this, but does not move (showing bottom left in screen 52). The current template is never part of a group, which can be comprised of stored templates only. To hide it again if it is in the way click the pad > hide current template menu item (CTRL-W). Templot temporarily hides the current template for you when you do store & background, but always shows it again during mouse actions. To show it when hidden, just press F12.
 If it seems annoying
to have the current template visible, remember that it is not part
of your track plan, and can be safely ignored when not relevant to the current
mouse action. There are often occasions when its presence is useful.
Then also try SHIFT+CTRL-F8 for the rotate group mouse action (screen 52).
The current position of the pegging notch is used as the rotation centre, so this can be positioned first if it is important (adjust > mouse action: pad > move notch menu item or adjust > notch options > set notch position... menu item). Usually it isn't important, because the shift and rotate group functions are simply used repeatedly by eye on the screen to get the desired result. Zoom in on a small area if exact positioning is important.
Smaller groups of templates can be moved in exactly the same way. Use the group select (toggle) menu item on the pop-up menu for each to add them to the group or remove them from the group.
screen 53:
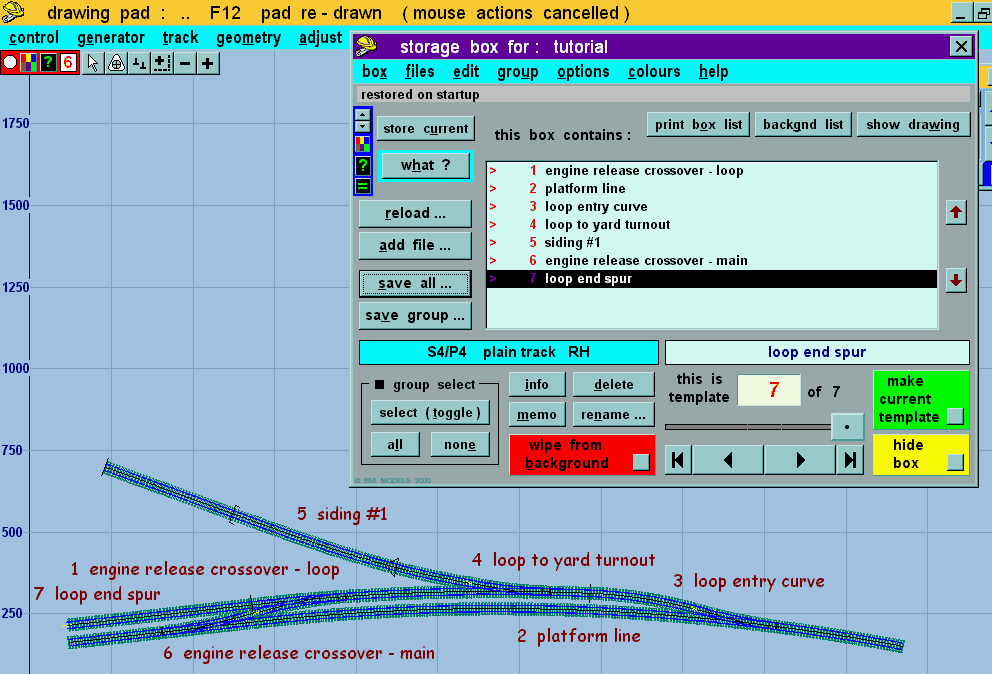
Having settled on a position for our track plan, we can take stock (screen 53). I have changed the font setting for the template name labels to full-size for this screen (pad > pad background options > background name labels > full-size menu option). The alternative scaled option causes them to be scaled down as the pad is zoomed out.
I also moved them about for a tidier screen (click on each template in turn and then select move name label on the pop-up menu for each).
screen 54:
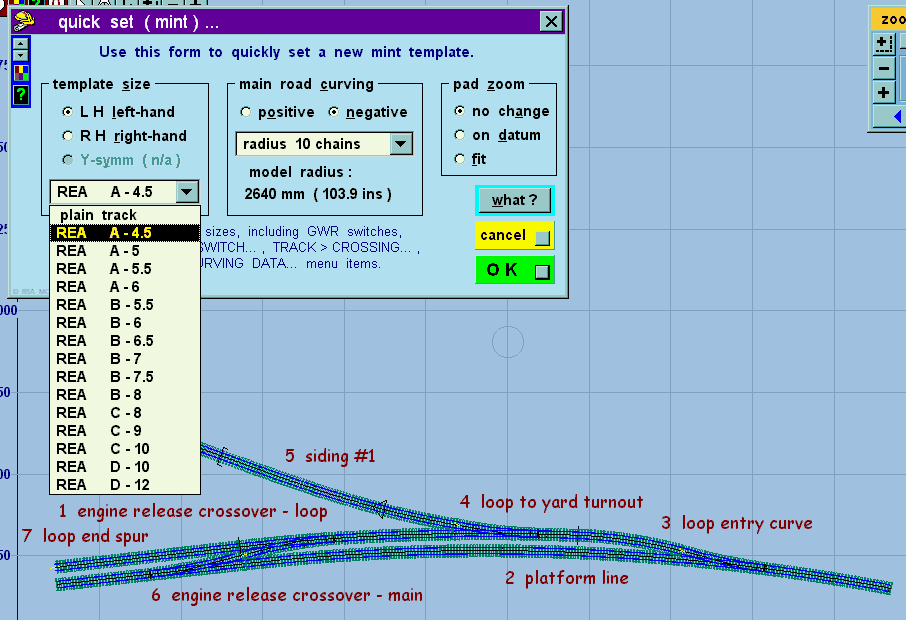
Now we decide to add a private siding via a turnout in the loop entry curve (template 3). So select quick set... again (CTRL-Q) to create the turnout (screen 54). This turnout will have significant negative curving, so we can use a short stubby one, REA A-4.5. The radius is immaterial because we are about to change it.
screen 55:
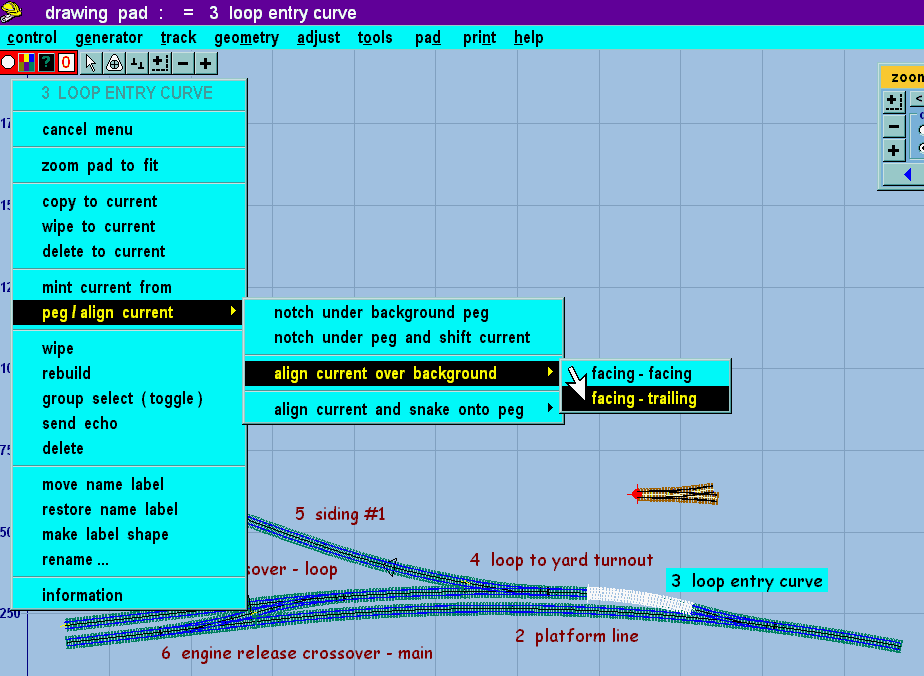
There it is looking lonely in screen 55. We want to align it over the loop entry curve, so click on this template for its pop-up menu. Click peg / align current > align current over background > facing-trailing. We selected the facing-trailing option because we noticed that the CTRL-0 datum end of the highlighted template is on the right, so it is facing to the left. We want our new turnout to face to the right, so this combination is facing-trailing. It's not always easy to see this with plain track - if we get it wrong we can just press CTRL-U (or adjust > undo changes menu item) and have another go.
screen 56:
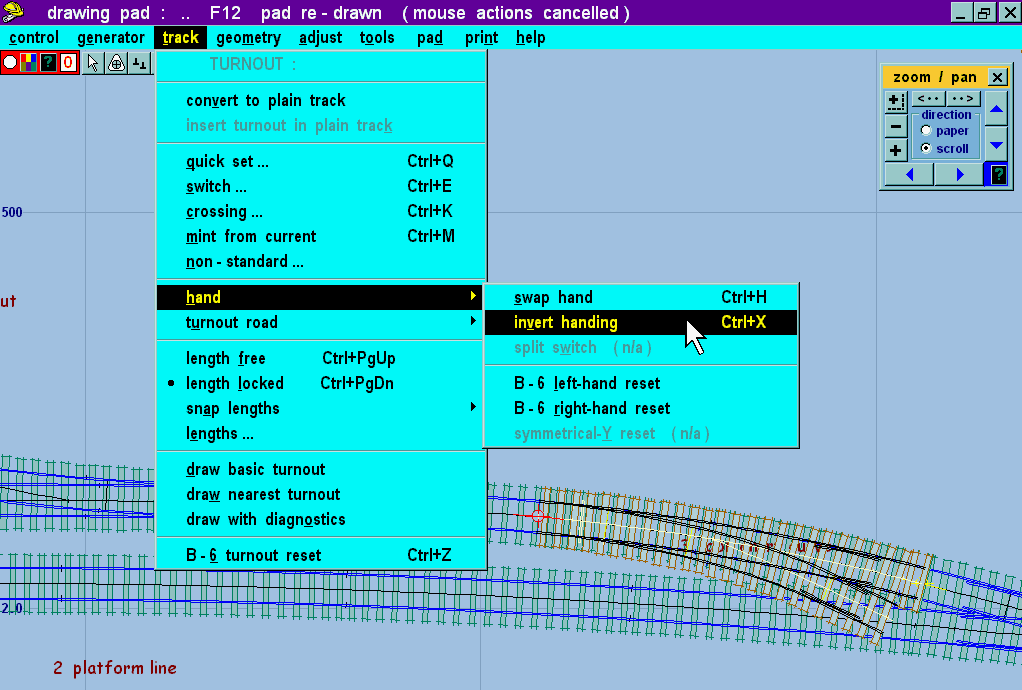
The facing-trailing alignment option always causes a change of hand, which in this case is not what we wanted (screen 56). So click the track > hand > invert handing menu item (CTRL-X). Invert handing means that the turnout road is swapped to the other side of the main road without disturbing the alignment.
The swap hand alternative function (CTRL-H) simply mirrors the template, so that the radii and other dimensions remain unchanged, but it destroys the alignment in the process. Try experimenting to understand the difference between these two functions.
screen 57:
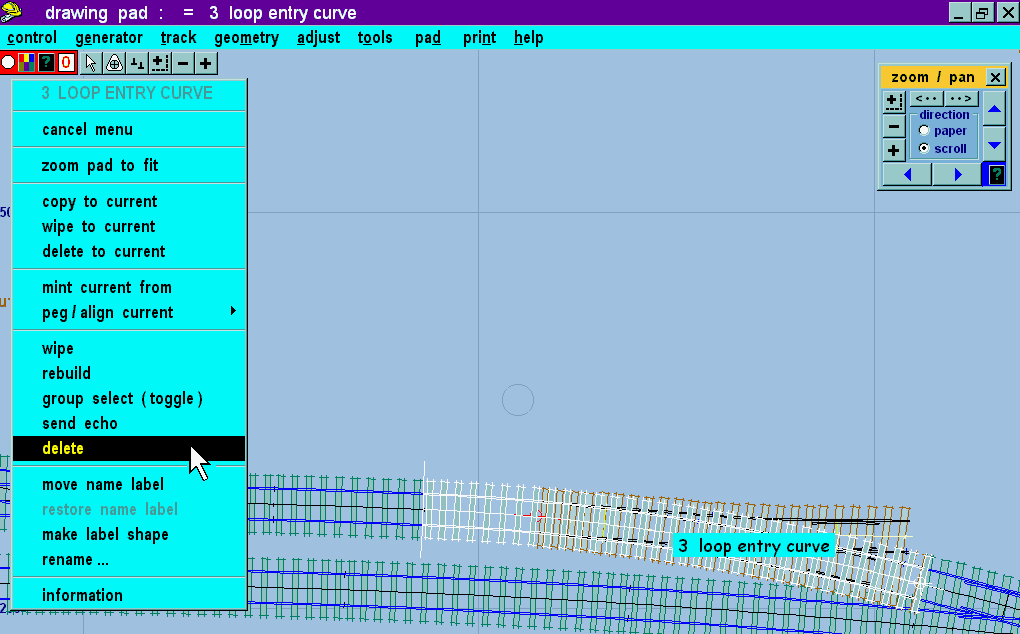
Having aligned the turnout we no longer need the underlying background template. Click on it and select delete (screen 57). Notice that clicking on it is unaffected by the presence of the current template above it. The pop-up menu applies to background templates only.
screen 58:
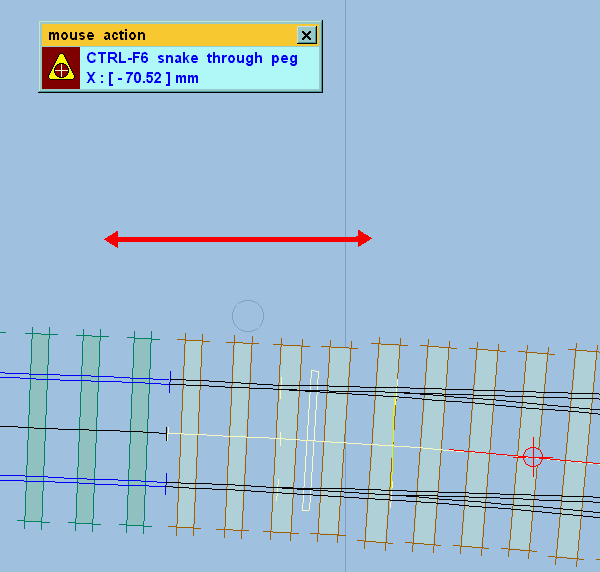
Screen 58. Although the turnout is now aligned (i.e. the curving line in the main road is established), it is still not in the desired position.
Press CTRL-F6 for the snake mouse action. Then slide the turnout back through its peg until it just joins the loop track (i.e. we have decided that no approach track is wanted).
screen 59:
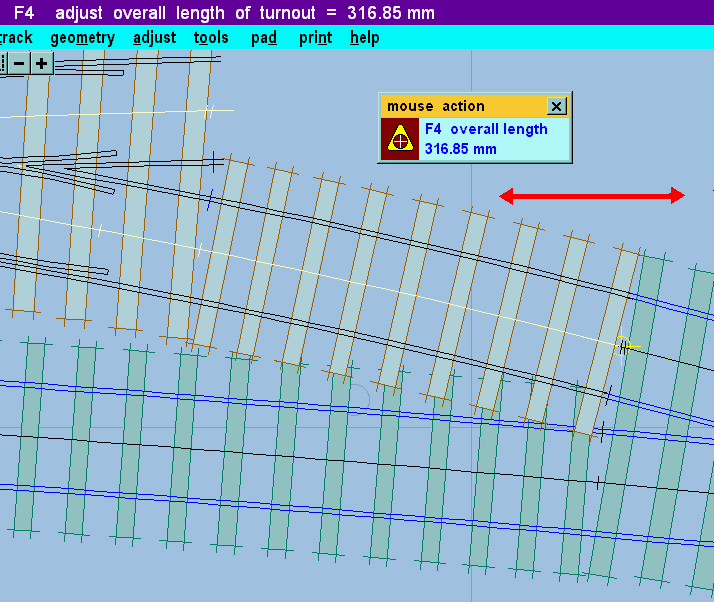
Screen 59. Then we fill the remaining gap with a short length of exit track (F4 overall length mouse action).
screen 59a:
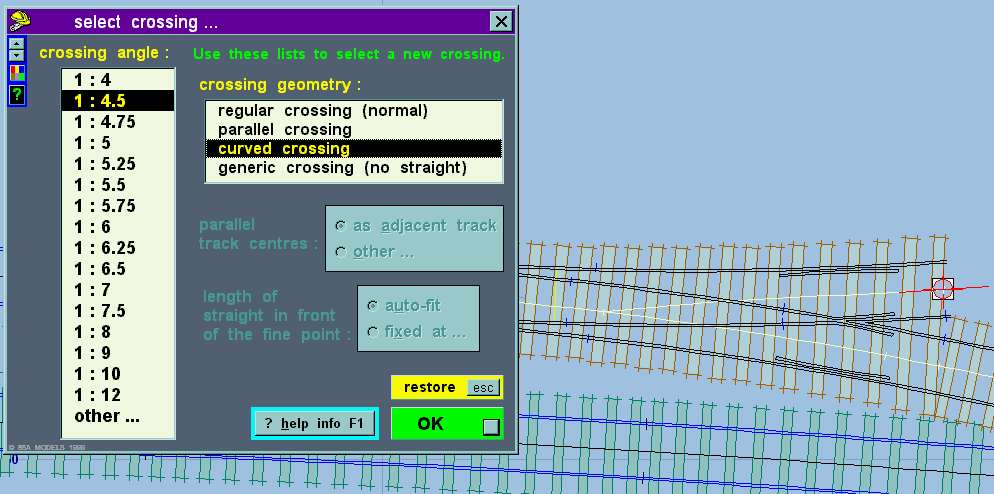
We can now proceed exactly as we did for the turnout into the yard siding (screens 36 to 43). This turnout also has significant negative curving, and a curved crossing is therefore needed for proper access to the siding. Likewise I have pressed CTRL-6 to position the peg and then the DIVIDE key to put the notch under it in readiness for attaching the siding (screen 59a).
Don't forget its name : "loop to works siding".
screen 60:
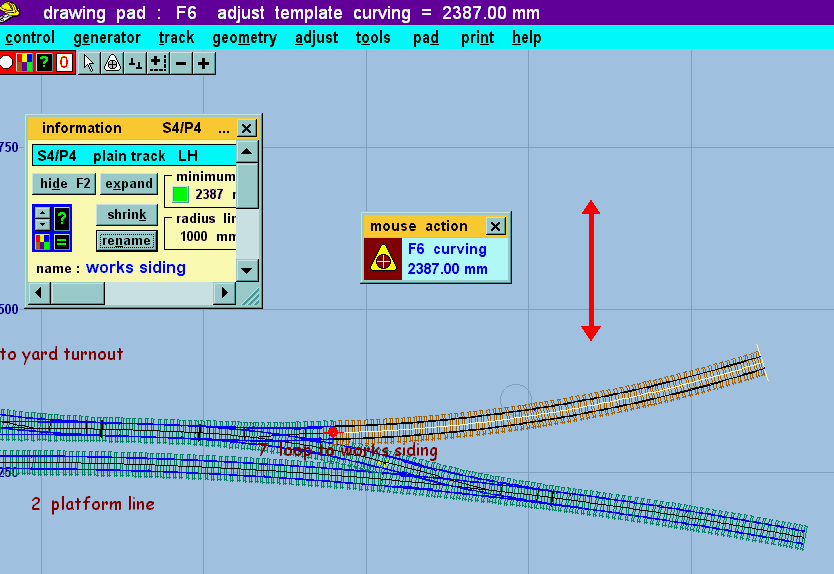
Screen 60. Having attached a length of plain track as we did for the previous siding (screens 38 to 43), we can adjust it's length (F3) and radius (F6) to taste. I have called it "works siding".
Click here to continue on the next page. To revert to this page use your browser's Back button.
back to the start • text-only version • other tutorials • getting started with Templot • Templot main page
© revised 30-12-00