Templot Club Archive 2007-2020
|
|||
| author | remove search highlighting | ||
|---|---|---|---|
|
posted: 16 Jan 2013 16:33 from: kimstation
click the date to link to this post click member name to view archived images |
Hi Martin, I am trying to draw a 72 inch radius left hand dual gauge turnout with the 3rd rail on the left side, constructed using SM32 & SM45 track gauges. I have successfully archived this creating a constant curved turnout, using a Curviform Vee crossing. However I now need the same turnout but with a straight Vee crossing, as there is a requirement for a turnout with a shorter curve for longer fixed frame locomotives. I am currently using a parallel Vee crossing. The problem I am having, is creating both Turnout road crossing rails with same radii, so that they feed smoothly into the Vee crossings and share the same switch. Please can help? Best regardsKim Jackman |
||
|
posted: 16 Jan 2013 21:51 from: Martin Wynne
click the date to link to this post click member name to view archived images |
Hi Kim, Sorry, I don't quite follow that. Can you post a screenshot or attach your .box file? Martin. |
||
|
posted: 17 Jan 2013 14:38 from: Martin Wynne
click the date to link to this post click member name to view archived images |
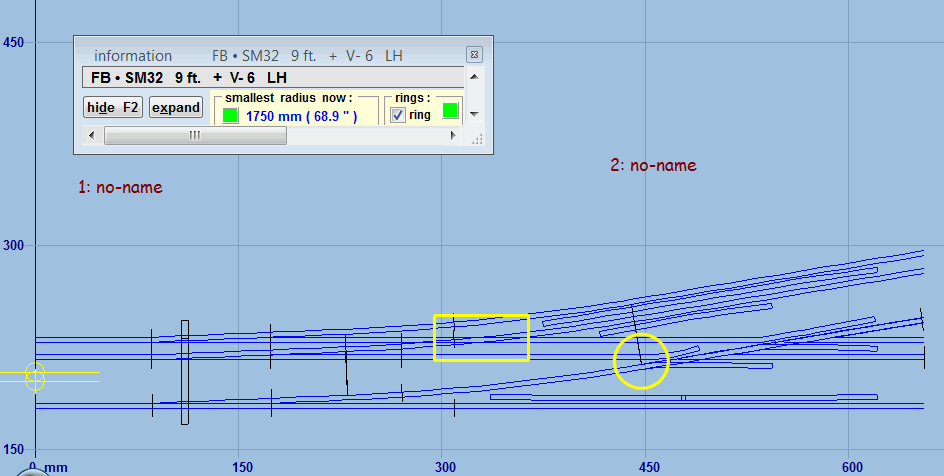
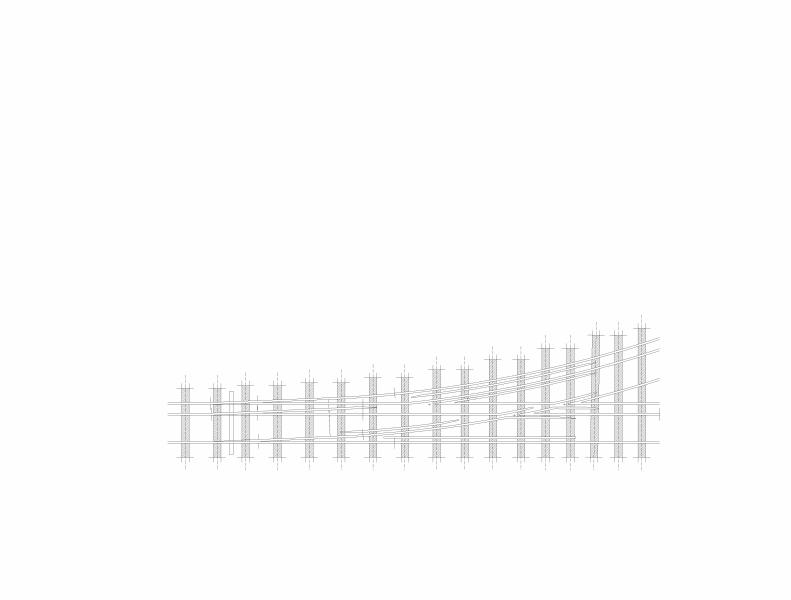
Hi Kim, Do you mean something like this? 2_170931_240000000.png  Adjust the crossing entry straight (SHIFT+F11 mouse action) on the wider turnout until the radial end marks are coincident (ringed yellow). This is just a quick unfinished trial -- note you also need a K-crossing (boxed yellow). I started tidying up the check rails. Here's the output, showing the FB rail foot edges: 2_171232_200000000.png  regards, Martin. |
||
|
posted: 17 Jan 2013 19:12 from: kimstation
click the date to link to this post click member name to view archived images |
Hi Martin,That is perfect thanks and as always, the information that I needed, the crossing entry straight and also the use of the K crossing which I hadn't previously used. I have attached a picture of the turnout that I previously produced with he curviform Vee crossing.I didn't use the K cross and pieced it together manually.Thanks again for this amazing software and all of your help. Cheers Kim 2421_171359_320000000.png  Martin Wynne wrote: Hi Kim, |
||
|
posted: 19 Jan 2013 17:02 from: Dennis Mowatt
click the date to link to this post click member name to view archived images |
If there any notes or handy hints for doing these, could I be pointed at them please? Regards Dennis |
||
| Last edited on 19 Jan 2013 17:03 by Dennis Mowatt |
|||
|
posted: 19 Jan 2013 17:36 from: Martin Wynne
click the date to link to this post click member name to view archived images |
Dennis Mowatt wrote: If there any notes or handy hints for doing these, could I be pointed at them please?Hi Dennis, Starting from where? If you already have the first turnout, simply store it and then change the track gauge to whatever you want for the second turnout -- gauge > modify current settings > modify track gauge... menu item. The two templates will share a common main-side stock rail. Adjust them as required and use partial templates in the usual way to put gaps in the rails under the crossings. If that's not what you want, there are some additional notes here, but it's 11 years old and very out of date: http://groups.yahoo.com/group/templot/message/770 I will try to get a proper tutorial done before too long. regards, Martin. |
||
| Please read this important note about copyright: Unless stated otherwise, all the files submitted to this web site are copyright and the property of the respective contributor. You are welcome to use them for your own personal non-commercial purposes, and in your messages on this web site. If you want to publish any of this material elsewhere or use it commercially, you must first obtain the owner's permission to do so. |