| Templot Companion | search | remove search highlighting | if the A-Z Index tab is missing click here |
Often a scaled prototype track plan is too large to fit your available layout space, usually because it is too long and mostly straight.
Templot can distort the scanned image of such a track plan by wrapping it onto a curve, so that it will fit your space and can then be used as a background guide for your track planning.
1. preparing the image
2. straightening the running line
3. wrapping onto a curve
There are two ways to display a scanned image on the Templot trackpad. It can be added as a picture shape as part of the background shapes functions; or it can be shown as a sketchboard item.
Either way can be used as a guide for track planning, but for this wrapping function the image must be added as a picture shape.
Here we have a scanned map of Corfe Castle station which I added as a picture shape:
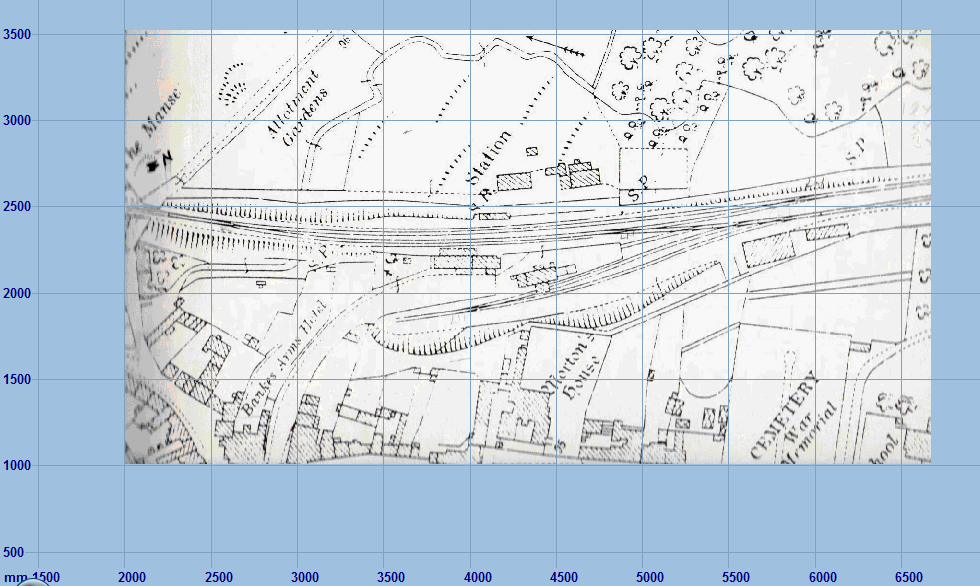
 The position of the picture shape on the trackpad doesn't matter because the wrapping function will be changing it. The position of the picture shape on the trackpad doesn't matter because the wrapping function will be changing it.But it should be correctly scaled to your current model scale. For more information about adding and scaling picture shape images see picture shapes. |
The intention is to fit a model based on Corfe Castle into the corner of a room. This will be the result of wrapping the image onto the corner curve, now ready to have the remaining tracks aligned over it:
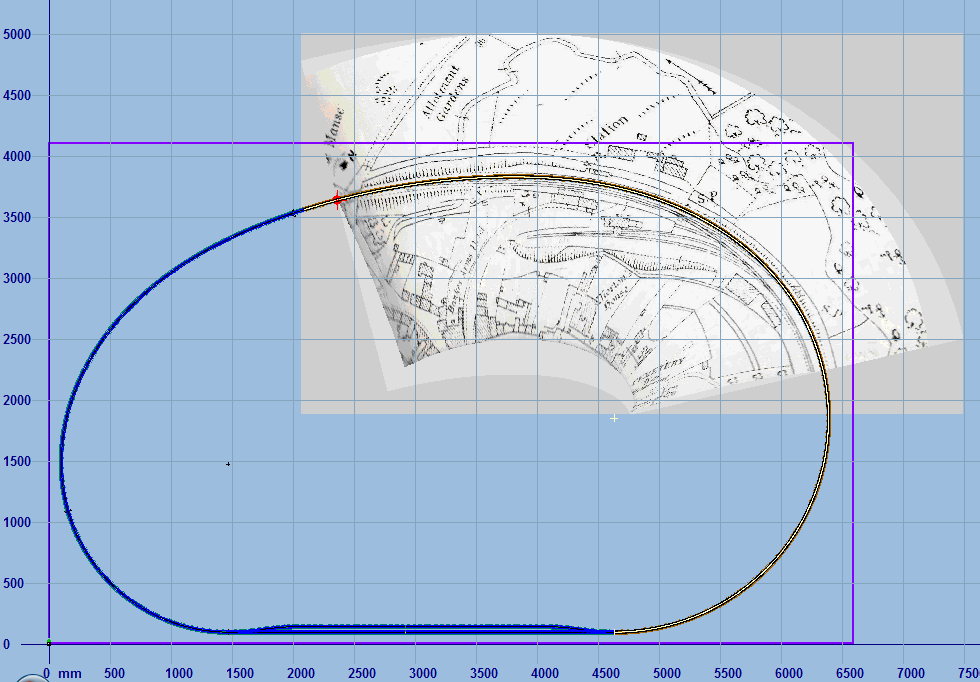
 Although this wrapping function can if necessary flip or mirror an image, or turn it the other way round (rotate it 180 degrees), I suggest that you do all that beforehand in a graphics editor program such as PaintShopPro or IrfanView. Otherwise it is too easy to make mistakes and produce unexpected results. Start with the image displayed on the trackpad already suitably oriented for your intended track planning, as above. Although this wrapping function can if necessary flip or mirror an image, or turn it the other way round (rotate it 180 degrees), I suggest that you do all that beforehand in a graphics editor program such as PaintShopPro or IrfanView. Otherwise it is too easy to make mistakes and produce unexpected results. Start with the image displayed on the trackpad already suitably oriented for your intended track planning, as above. |
 If you want to try it, this original image file is on Templot Club forum at Corfe Castle scan . It is 300dpi resolution and 1:2500 scale. Thanks to Neil Berrington for the scan. If you want to try it, this original image file is on Templot Club forum at Corfe Castle scan . It is 300dpi resolution and 1:2500 scale. Thanks to Neil Berrington for the scan. |
2. straightening the running line:
The wrapping process takes place in two stages. Before the image can be wrapped onto the final curve, it must first be straightened along the desired running line.
To do this the running line is defined by aligning the control template over it. This control template is not part of your track plan, it is a dummy template used only for this wrapping function:
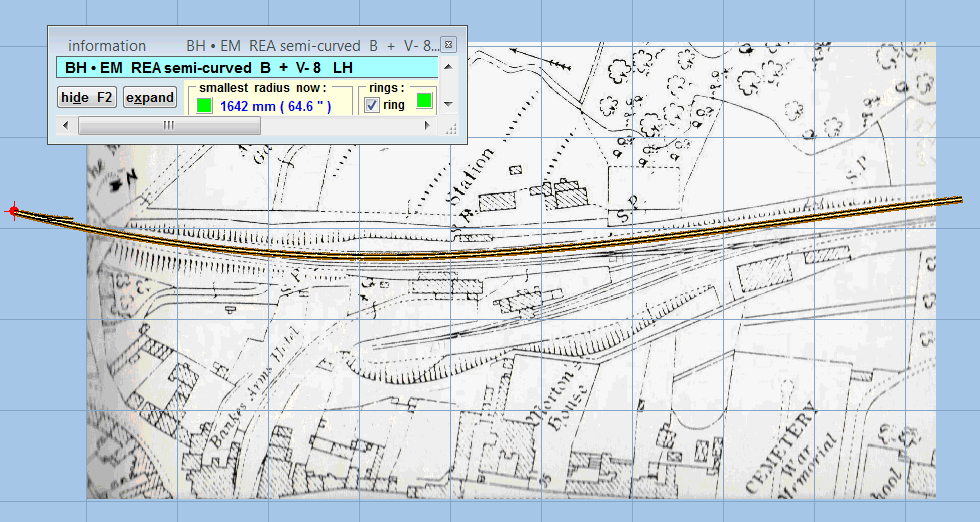
• The control template should be a left-hand template running from left to right across the image. The easiest way to confirm this is to insert a turnout in it, as above. This will have no affect on the wrapping function which uses the main-road centre-line only. Running from left to right means that is the facing direction for the turnout, with the CTRL-0 datum position on the left, as above.
If the above conditions do not apply, the wrapped image will be inverted or mirrored. Which may be what you want, but it will likely need some trial and error to get exactly what you intended.
The entire running line must be defined by a single template. This can usually be achieved by using a transition curve, possibly combined with a slew. This one above is a long S-curve transition, which has matched the map quite well:
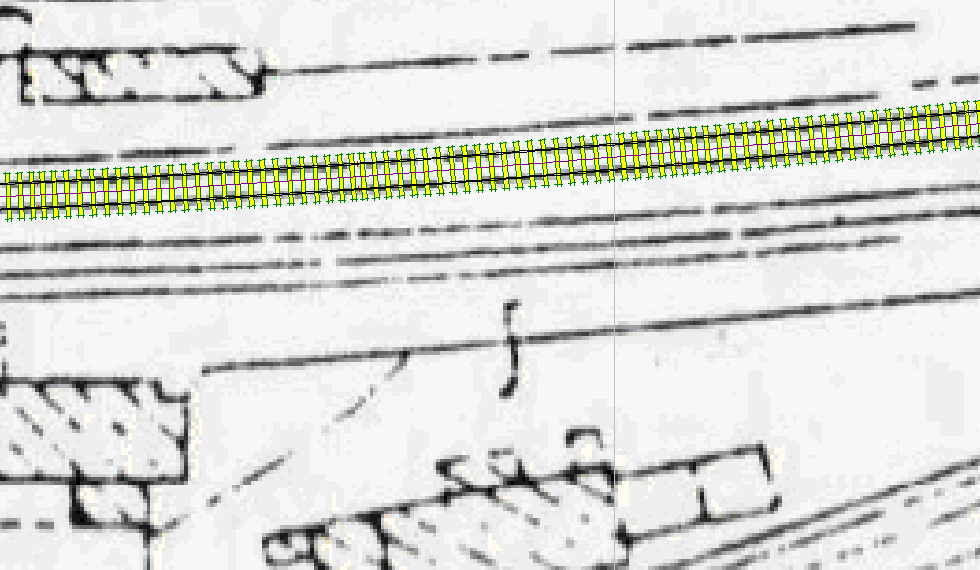
If the running line can't be defined with a single template, it will be necessary to split the image into two or more picture shapes, and wrap each one separately.
For more information about aligning templates over a background image see the swell mouse action to create dummy templates, and the make transition function to link them with a transition curve.
When you are satisfied with the template alignment, zoom in and slide the peg along to coincide with the left edge of the image (CTRL-F8 or 8-key mouse action):
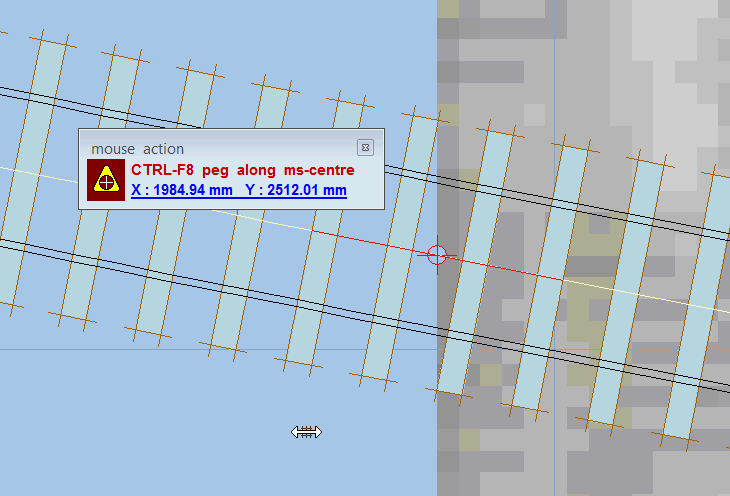
Leaving the peg there, zoom in on the far end of the template and shorten it so that the end of the centre-line coincides with the far edge of the image (F4 mouse action):
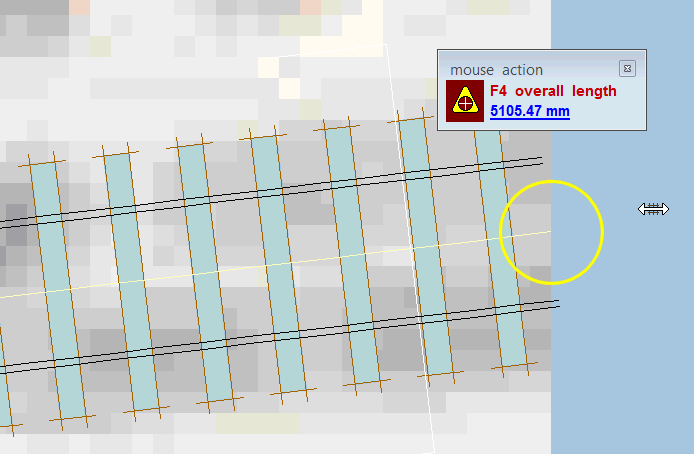
So that the end result is:

At this stage you may want to store this template as unused ( main > store as unused menu item), or park it ( do > parking bay > park template menu item) so that you can retrieve it again later if you need to re-try the wrapping function. And also save the BGS file for this picture shape ( save all as... button on the background shapes dialog).
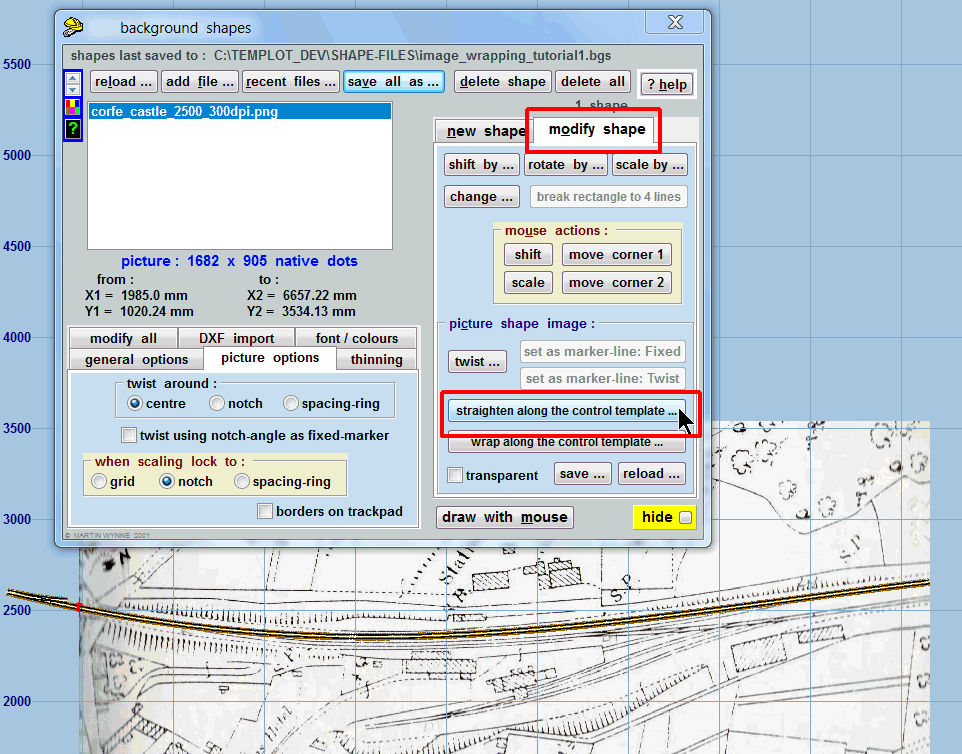
Now on the background shapes dialog select the picture shape in the list. Then click the modify shape tab and then the straighten along the control template... button:
You will then be asked about banding. Click the white bar more information to read the notes:
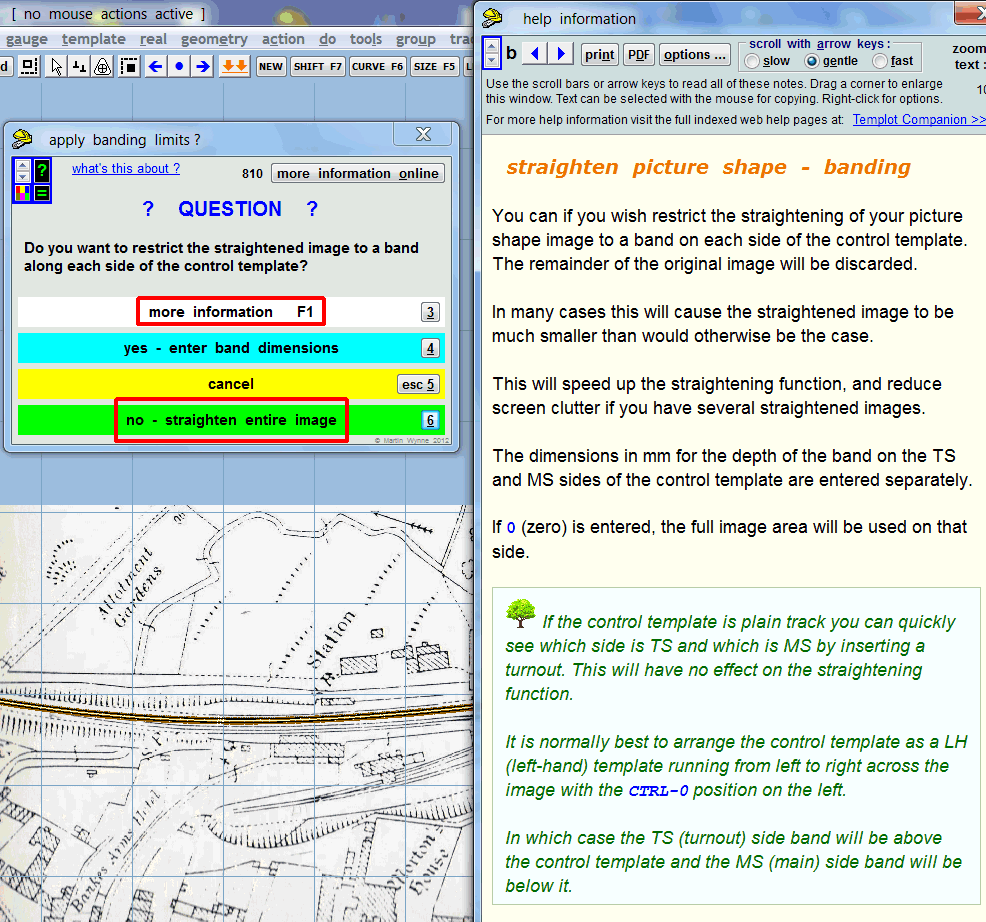
Or for the present tutorial click the green bar to straighten entire image and continue.
After a confirmation dialog and a short wait while Templot does the calculations, this will be the result:
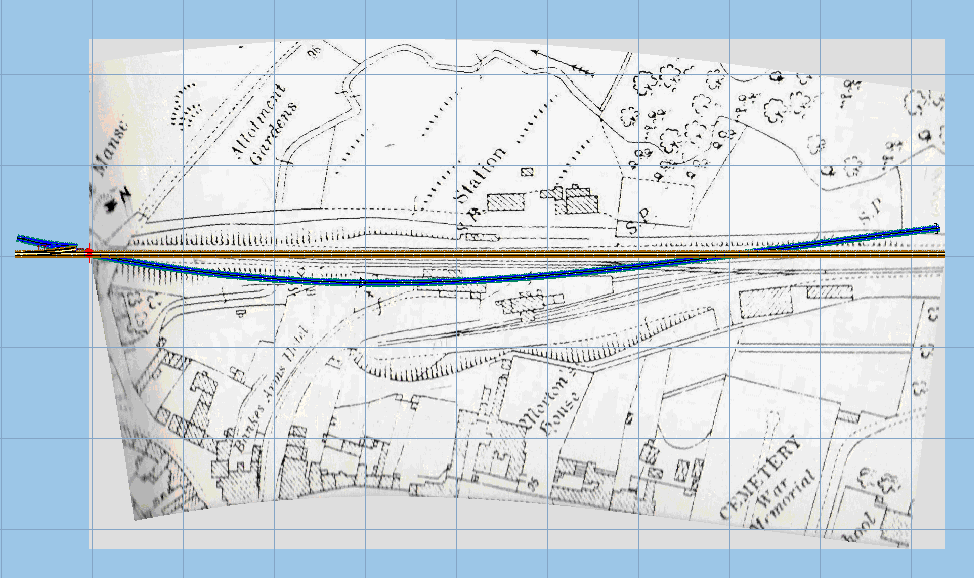
The dummy control template is now straight with the running line in the image aligned along it. The previous control template has been stored as a background template so that you can easily retrieve it if necessary, otherwise you may prefer to delete it as no longer needed.
At this stage it would be wise to save another BGS file now with the modified picture shape.
Here is the railway room with an outline of the intended layout.
Again, the control template should run left to right with the CTRL-0 datum on the left. If necessary click the template > swap end-for-end menu item (CTRL-N) to achieve this.
Slide the peg along the control template (CTRL-F8 or 8-key mouse action) to the required position for the left edge of the image after wrapping. This may require some trial and error to get a happy result, so before proceeding be sure to save a BGS file to which you can revert if necessary:
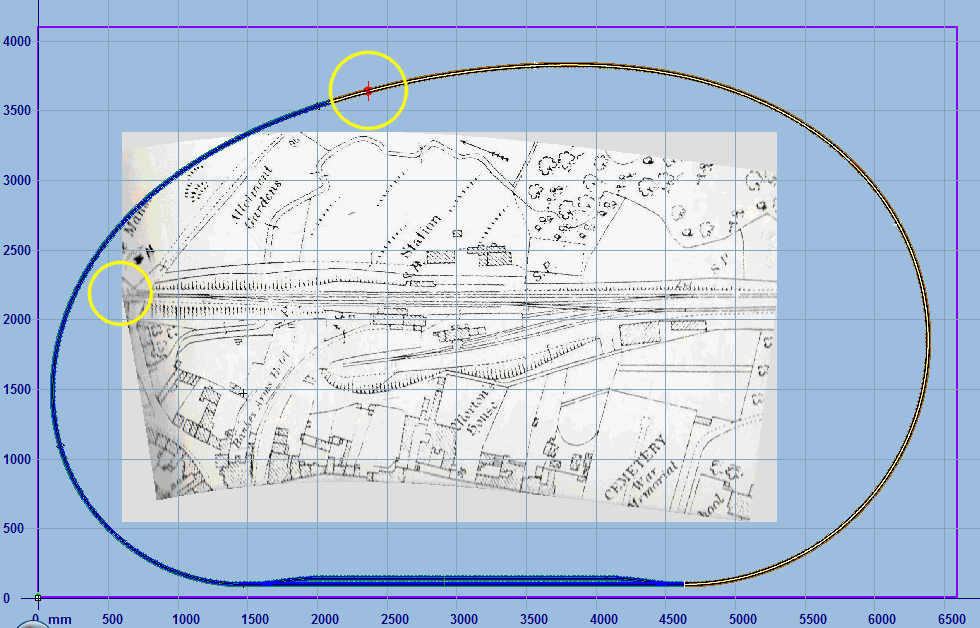
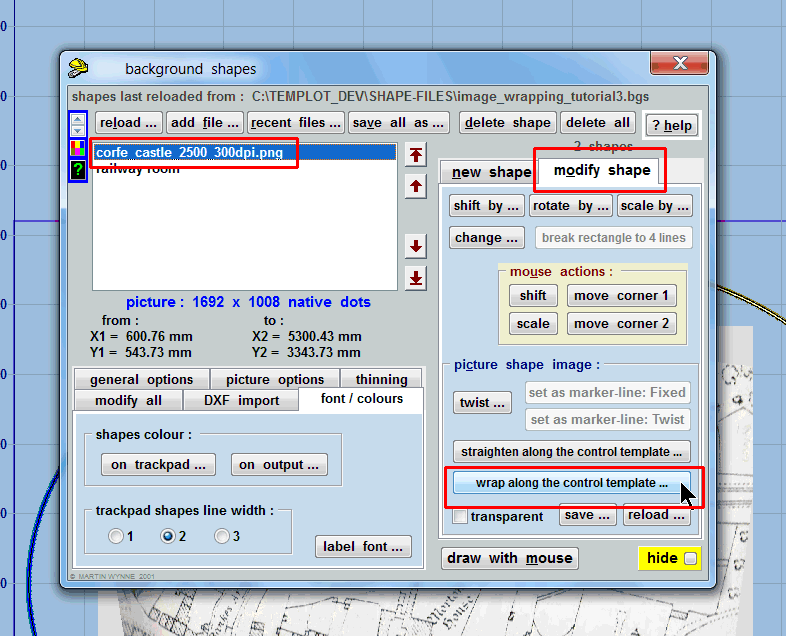
Now on the background shapes dialog select the picture shape in the list. Then click the modify shape tab and then the wrap along the control template... button:
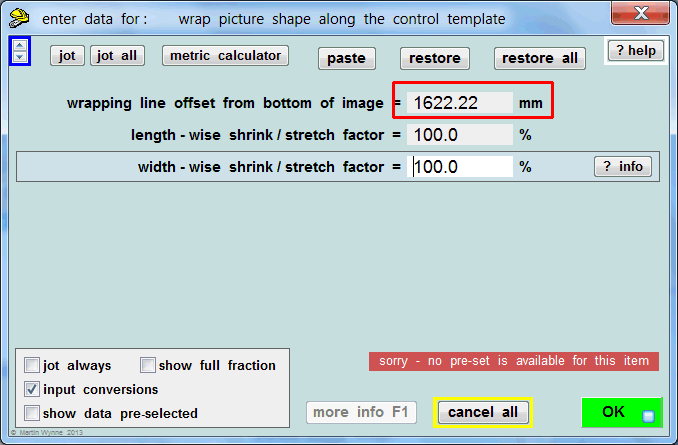
This dialog will then show. For an image which has been straightened, Templot has already calculated the wrapping offset dimension, and you should normally leave it unchanged:
After a confirmation dialog and a short wait while Templot does the calculations, this will be the result:

Zooming in, you can see that the map image has been closely aligned to the control template. The remaining tracks can now be added using the map as a background guide:
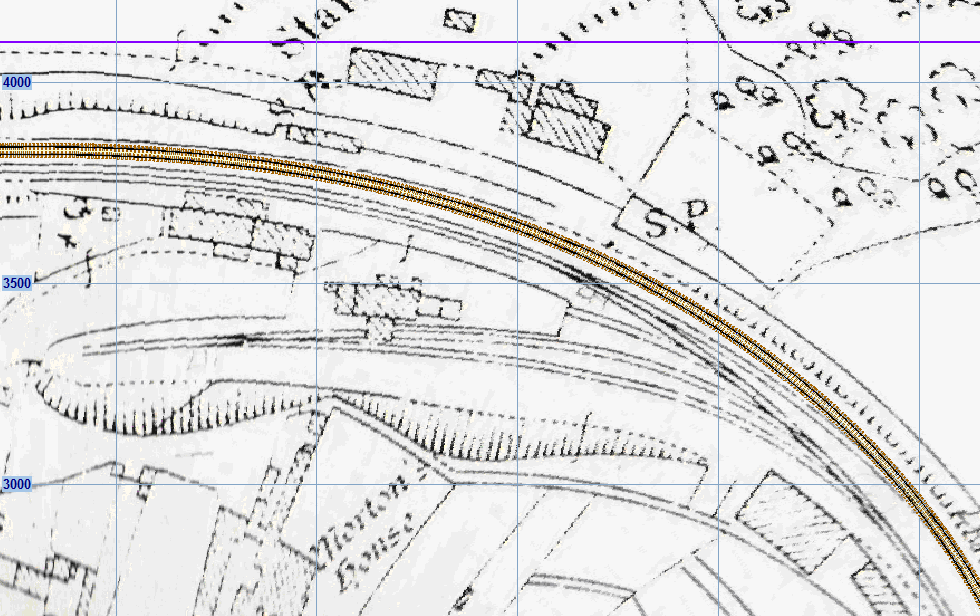
If you are happy with the result, remember to save a final BGS file with the wrapped picture shape.
Finally here are a couple of sketchboard views:
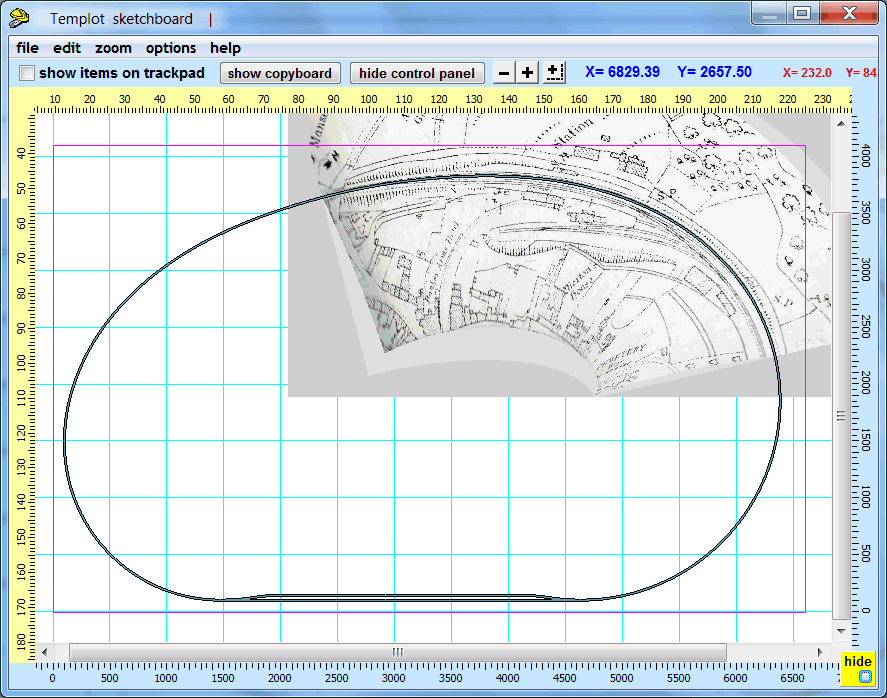
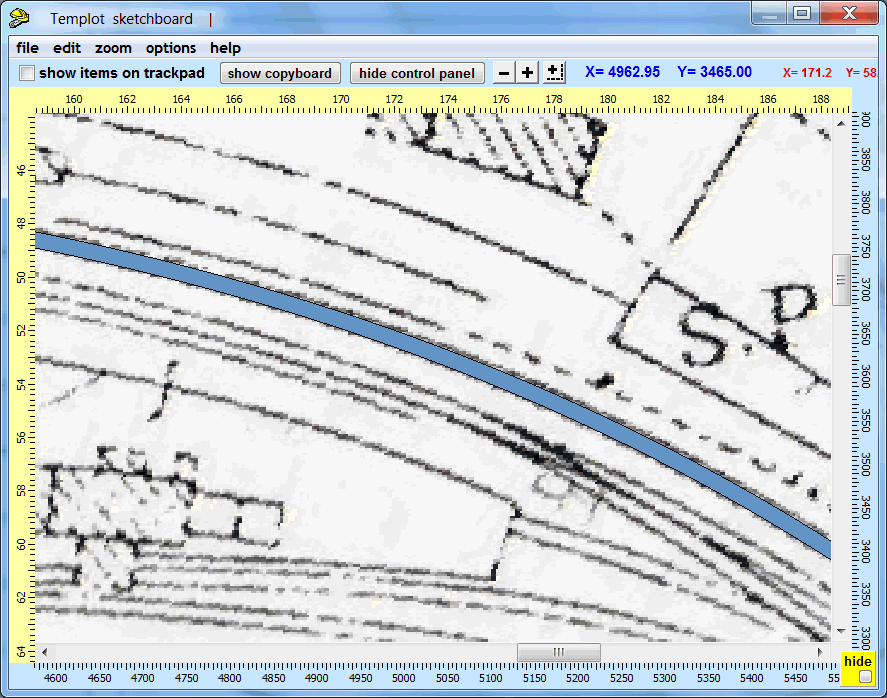
Martin.
link to this page: https://85a.uk/templot/companion/wrap_picture_shape_to_curve.php