| This tutorial is over 20 years old, it is completely out of date, and is shown here for interest only. Please refer to the Templot Companion User Guide for current information. |
Page 4. Click here to skip this page : next page
In screen 27 we have a reminder of what we are aiming for.
I have changed the screen grid spacings to feet for this shot.
screen 27:

screen 28:
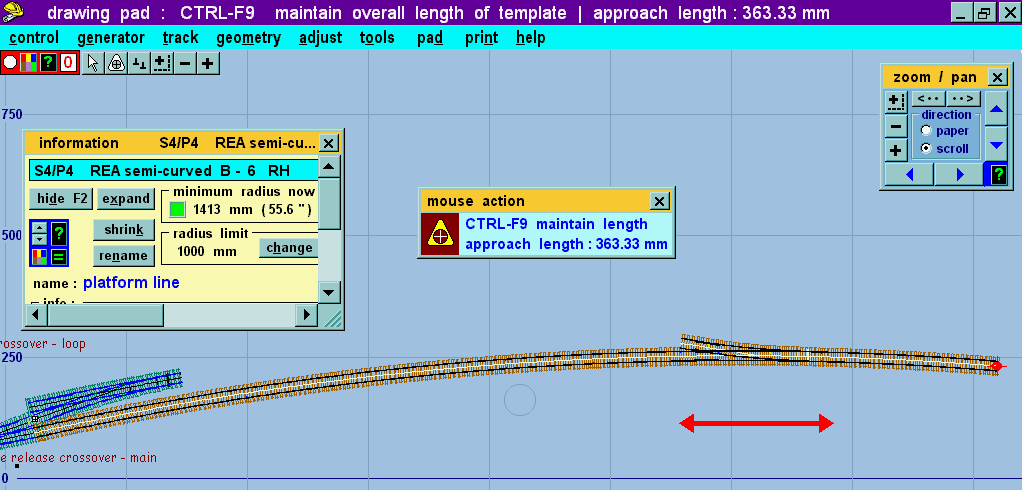
Now in screen 28 we have the B-6 turnout, and the minimum radius within it has reduced to 1413 mm - 55", which is acceptable. But the platform is much longer than we need. So press CTRL-F9 for the maintain length mouse action. Now with the mouse slide the turnout along the track until the approach length shown in the mouse action panel is about 360 mm.
The maintain length mouse action shortens the exit track length and simultaneously increases the approach track length by the same amount (or vice versa), thus maintaining the overall length of the template constant.
Because this mouse action doesn't change the alignment or length of the template, it is not locked to the drawing at the fixing peg and there is no need to consider the position of the peg. (The peg would be free to move with the turnout if it wasn't at the datum end of the template.)
screen 29:
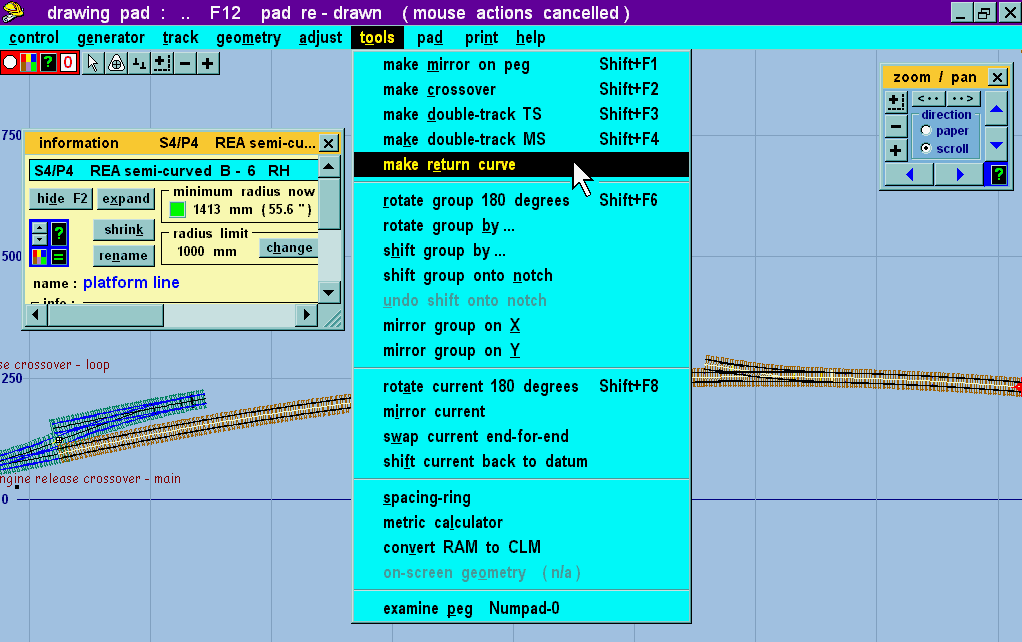
Screen 29. We now want to curve the turnout road round into the loop, so click the tools > make return curve menu item.
screen 30:
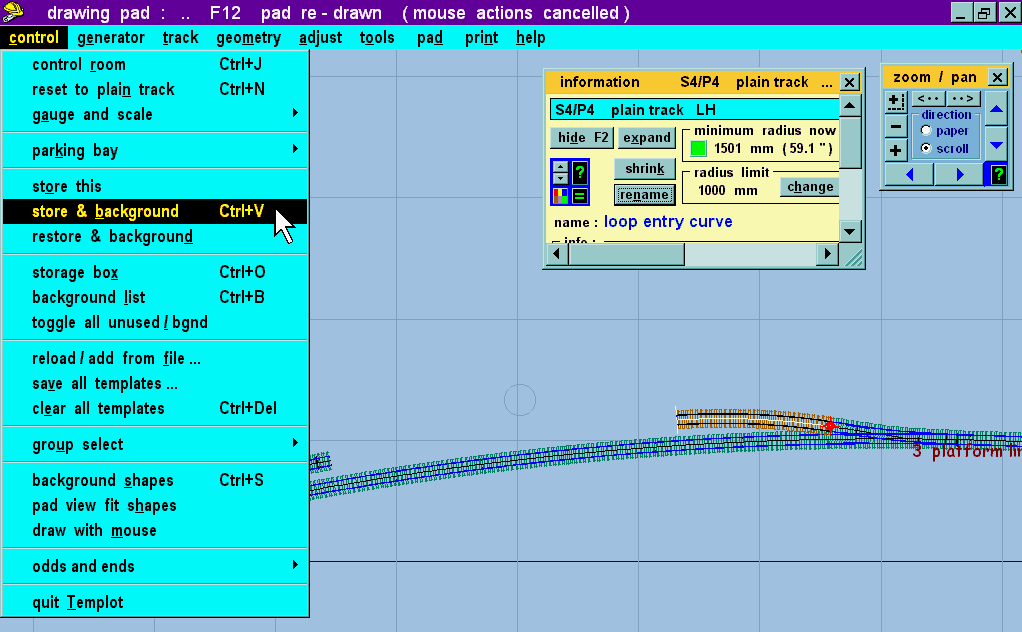
In screen 30 Templot put the platform line on the background for us, and then created a short return curve plain track template for the entry to the loop. It's just what we wanted, so name it "loop entry curve", and then click the control > store & background menu item to put that on the background also (or CTRL-V).
(A return curve is a frequent need and there are several ways in Templot to create one. See the return curve tutorial for a detailed look at this subject.)
screen 31:
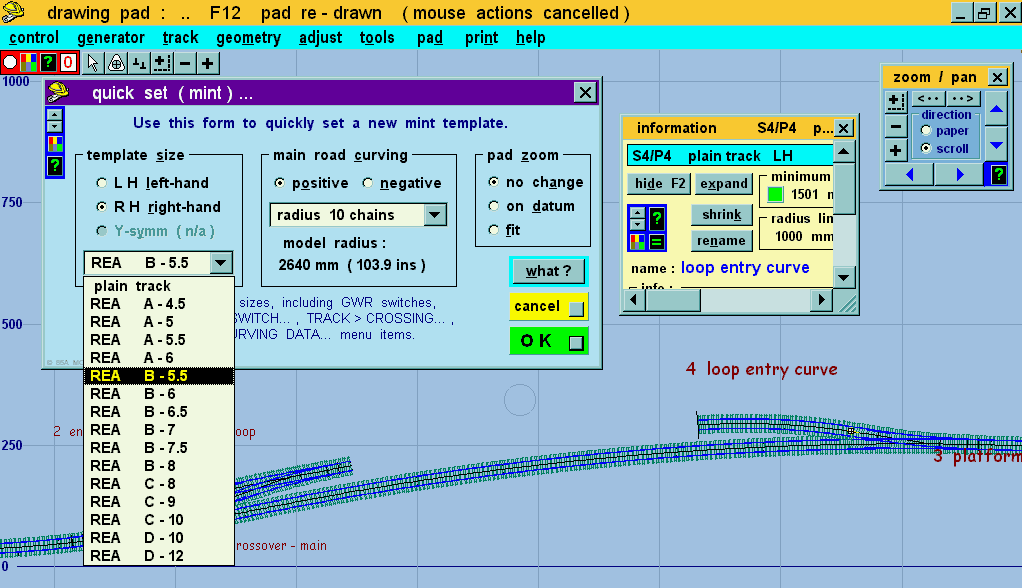
Now we want a turnout for the yard siding from the loop. This will have negative curving so we can use a shorter crossing angle. Click the track > quick set... menu item and then on the form select a right-hand REA B-5.5 turnout, as shown. There is no need to set the radius, because we are about to change it (screen 31).
The last time we used this quick-set form the previous current template was on its green dot datum point, so the new mint template went there too. This is no longer the case, so the new mint turnout current template will appear instead in the middle of the pad, awaiting our attention.
screen 32:
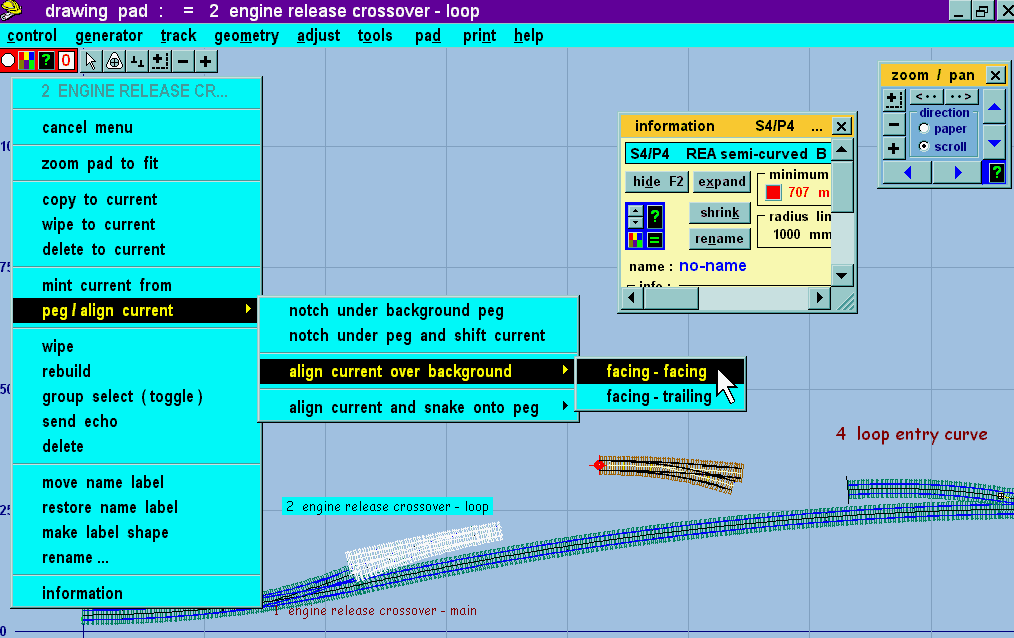
Screen 32. We want to align this new turnout with the loop, so click anywhere on a background template which has the loop alignment. There is only one of these so far, the loop turnout in the engine release crossover. Click on it to bring up the pop-up menu.
Now select the peg / align current > align current over background > facing-facing menu item.
screen 33:
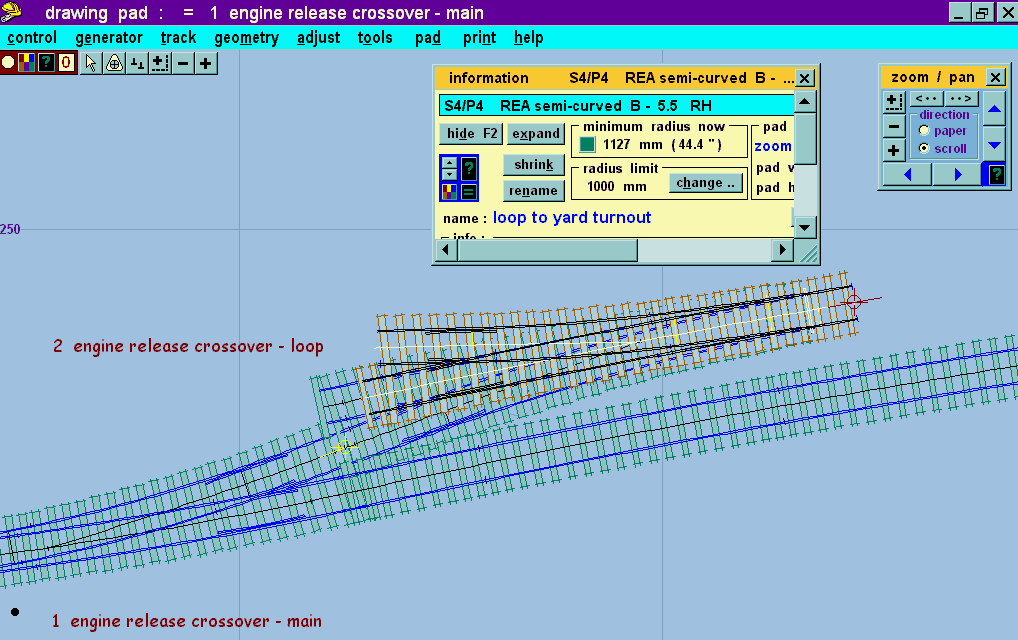
The result is this (screen 33): The current template has been aligned over the background template. And selecting the facing-facing option has meant that both the templates are facing the same way along the track.
Now is the time to click the rename button before we forget. This turnout will form the entry into the goods yard, so I have named it "loop to yard turnout".
screen 34:
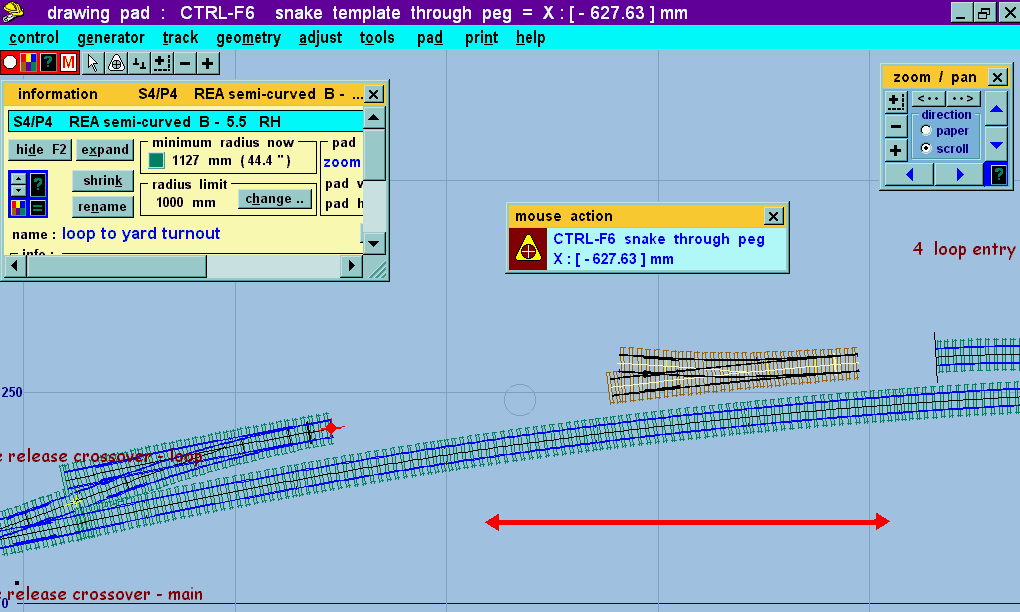
Now press CTRL-F6 for the snake mouse action. With this mouse action we can slide the turnout along an imaginary alignment line, until it is in the position we want. Your figures in the mouse action panel may be significantly different (screen 34).
 Although the peg
is now well outside the extent of the template track area, the red peg shown
is still part of this current template. Every template has
its own peg. The pegs belonging to the background templates
are showing in yellow on these screens.
Note that the peg indicator is showing M for mouse. This reflects the fact that the peg dimensions within this template are changing as the peg remains static and the template's distance from it is adjusted with the mouse.
screen 35:
Having settled on a position for the turnout, we have a choice. We can fill in the gaps with approach and exit tracks which then belong to this template, or we can insert lengths of plain track in the gaps as separate templates.
The former method is quick and easy, putting everything in one template.
The latter method is more suitable if you are planning to insert additional turnouts in these lengths. The quickest way to create these plain track lengths, however, is to use the tools > make split > functions, so in either case we can proceed in the same way:
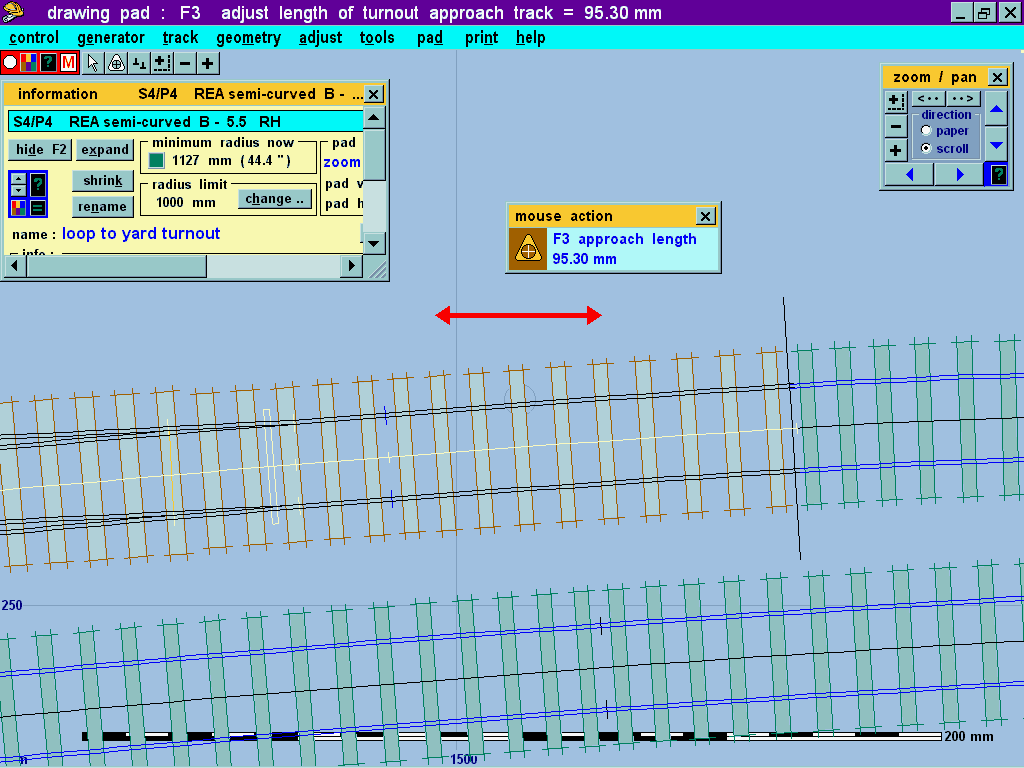
Press the F3 function key for the approach track length mouse action. Note that the peg is not in the CTRL-0 datum position (still showing M). This is important. It means that as we extend the approach track to fill the gap (screen 35), the turnout stays put. Compare this with what happened way back in screen 5, when the peg was in the CTRL-0 position.
Adjust the approach length until the track just fills the gap. It is not necessary to be ultra-fussy about this, a slight gap or overlap will have no effect on the final accuracy of the track plan. If you look carefully at screen 35, you will see that I have overlapped by about 1mm at the join.
Don't be concerned if the sleeper spacing is untidy at the join, we shall be coming back to adjust the timbering when we are happy that the rail alignments for the whole track plan are finalised.
screen 36:
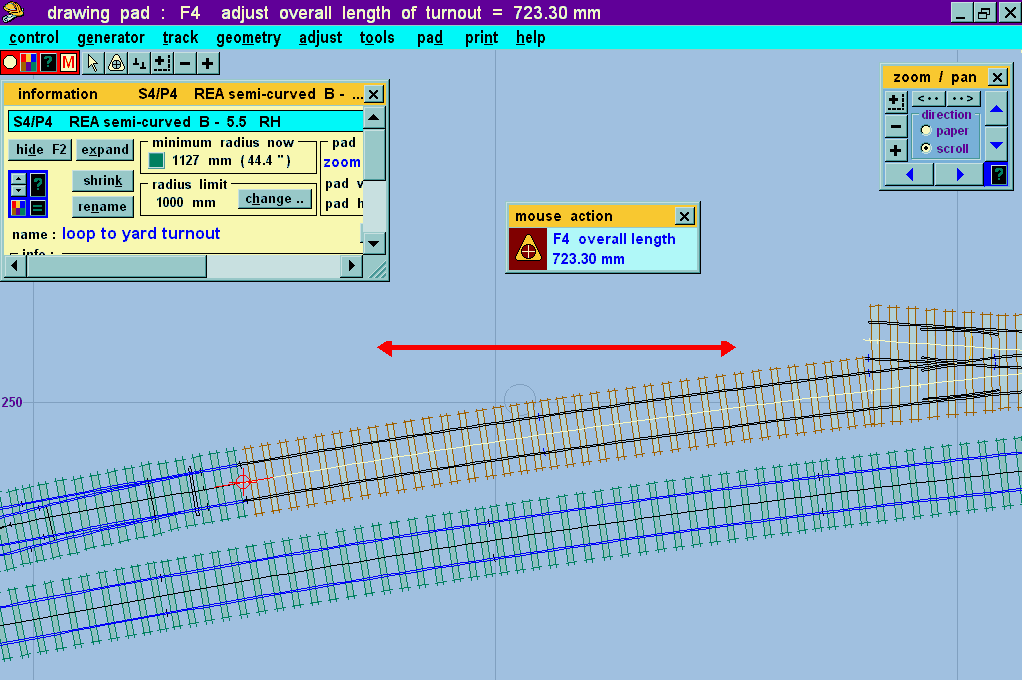
Press the F4 function key and repeat the process with the overall length mouse action (screen 36) to add the exit track. In this case it is important that the fixing peg is not in the CTRL-9 peg on length position, otherwise the turnout would be displaced to the right while the peg is locking the end of the exit track.
Again a slight gap or overlap at the join is of no consequence.
Click here to continue on the next page. To revert to this page use your browser's Back button.
back to the start • text-only version • other tutorials • getting started with Templot • Templot main page
© revised 30-12-00