| This tutorial is over 20 years old, it is completely out of date, and is shown here for interest only. Please refer to the Templot Companion User Guide for current information. |
Page 5. Click here to skip this page : next page
screen 36a:
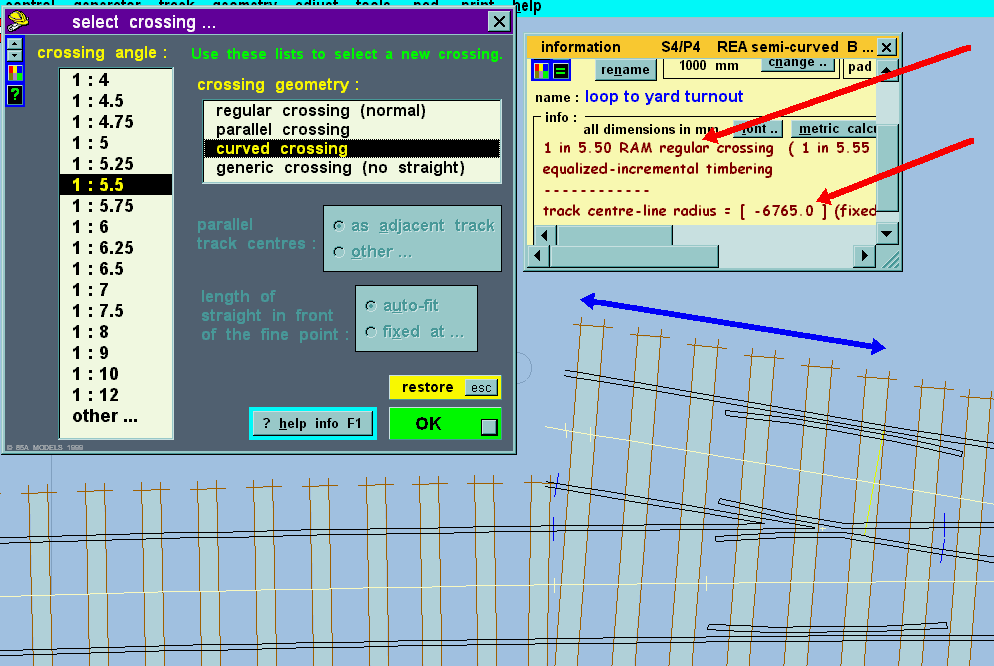
Screen 36a. This turnout, like the previous ones on our plan, has a regular crossing. This refers to the geometry of the turnout road at the crossing (the length indicated by the blue arrows in screen 36a). This length extends from the turnout radius end mark (marked in yellow across between the rails) to the end of the turnout.
 In a
regular crossing, this part of the turnout road
is curved in the same direction and to the same
radius as the main road at the crossing. Please read
that again, it is an important concept.
This means that when the turnout is a straight turnout (geometry > straight menu item), with the main road dead straight, then this part of the turnout road is also dead straight.
When the turnout has negative curving, as it does here (Y-effect turnout), then this part of the turnout road also has negative curving. If you look carefully at screen 36a you can see this - the turnout road is beginning to curve down, producing a slight reverse curve at the turnout radius end mark.
This effect is desirable when the turnout is part of a crossover between curved running lines, producing an easy reverse curve between the crossings, and in such cases a regular crossing always gives the best result. Likewise when there is a return curve - zoom in to have a close look at the crossing for the turnout at the right-hand end of the platform line (screen 30).
In other cases however, we may not be forming a crossover. Often, as here, we are accessing a siding, and in such cases we usually want the roads to diverge as rapidly as possible. So for this turnout we want a curved crossing.
Click the track > crossing... menu item to bring up the crossing window, as shown.
For more detailed notes about these different types of crossing click the ? help info button or press F1.
Select curved crossing on the list as shown. Then click OK.
screen 37:
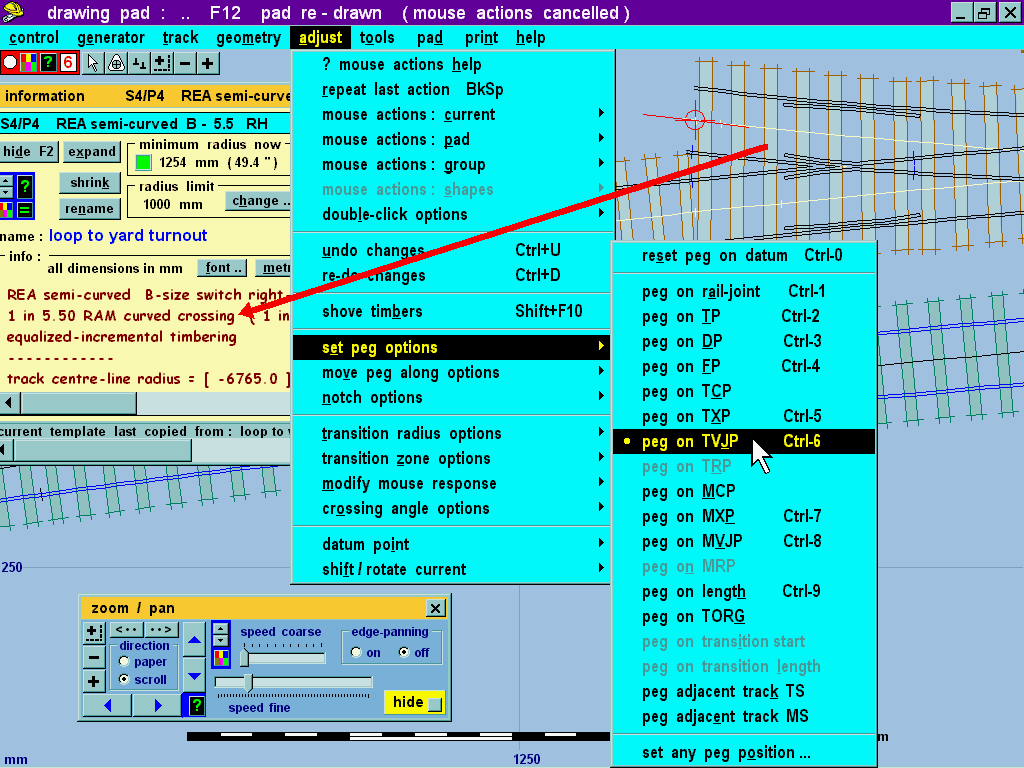
This is the result (screen 37). Our turnout now has a curved crossing. There is no end mark for the turnout radius because it continues unchanged through the crossing, and the roads are diverging rapidly.
Also on this screen I expanded the zoom / pan window by clicking the ••> button to access the panning speed adjusters. Click the green [?] button on the panning window for more information about using the panning controls.
Now we want to attach a length of plain track to this turnout to form the siding. So click the adjust > set peg options > peg on TVJP menu item, or press CTRL-6. I have already done this and you can see that the fixing peg is now at the TVJP (turnout-side vee-joint position).
For more information about all the peg positions in this menu, click pre-set peg positions.
screen 38:
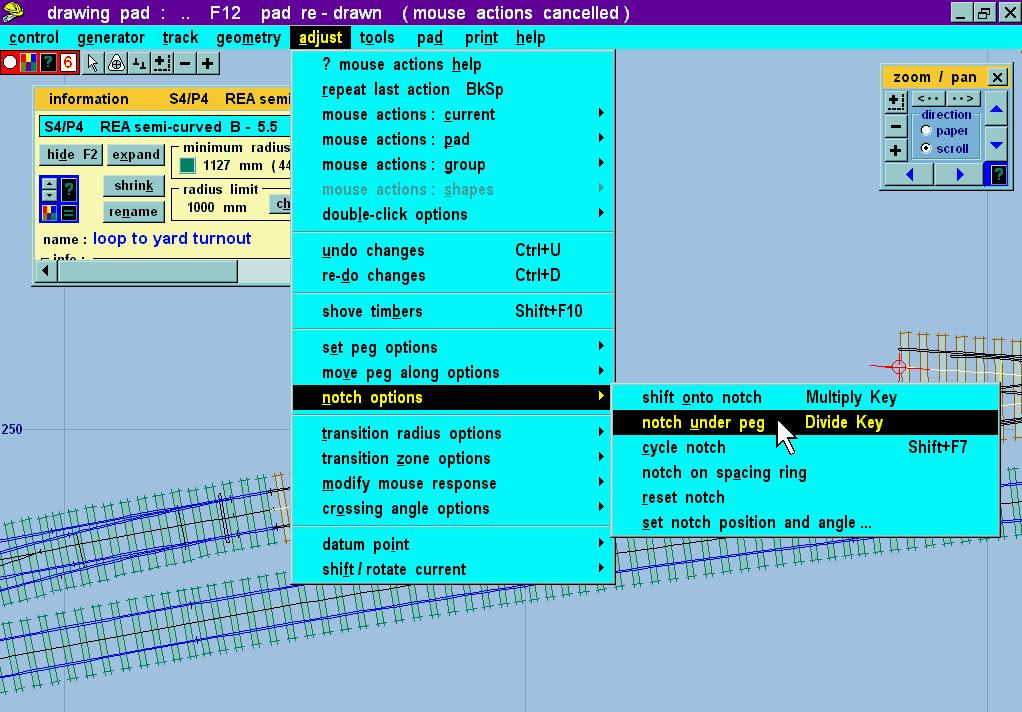
Screen 38: Now we bring the pegging notch into play. This is used as a "memory" device for peg positions and angles, so that templates can be joined together in perfect alignment. To read all about using the peg and notch functions please click peg & notch.
Click the adjust > notch options > notch under peg menu item, or just press the DIVIDE key (slash key on the NUMBER-PAD).
screen 39:
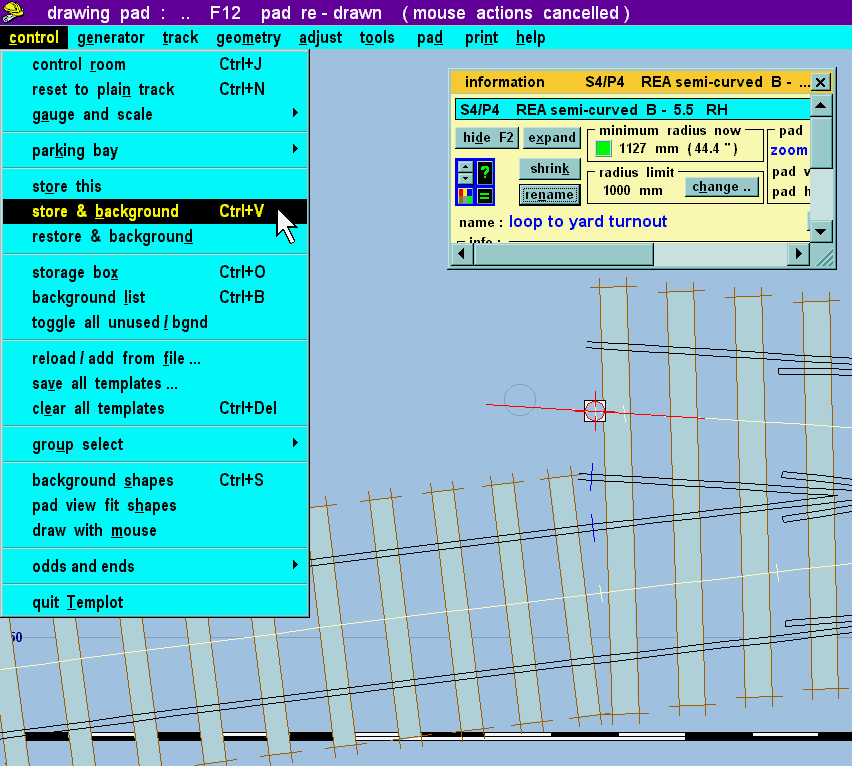
The notch appears as a white square under the red peg in screen 39. Now we can put this template on the background, control > store & background menu item (CTRL-V).
screen 40:
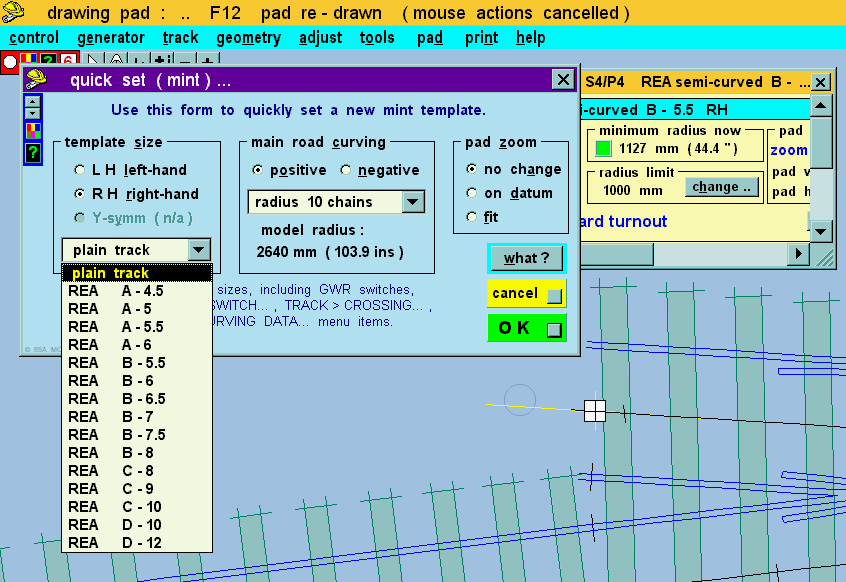
We now want some plain track for the siding, screen 40. Click the track > quick set... menu item again (CTRL-Q) to get some. The curving radius is immaterial because we are about to change it.
screen 41:
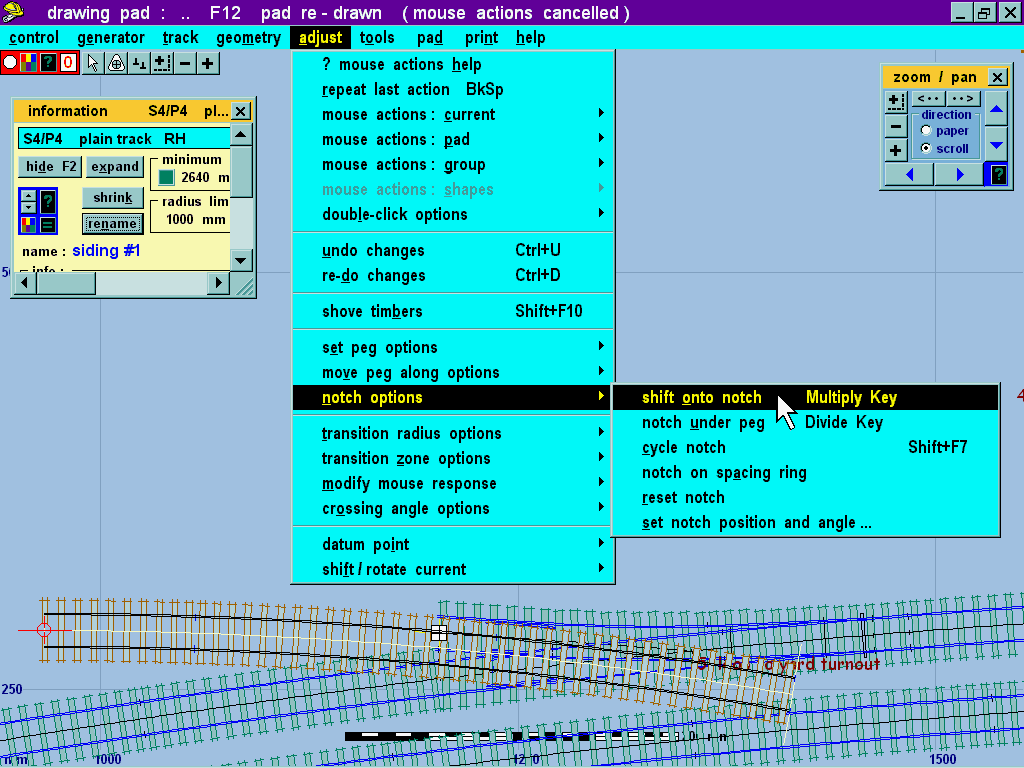
Our plain track appears in the middle of screen 41. Name it "siding #1" and then click the adjust > notch options > shift onto notch menu item, or press the MULTIPLY key (asterisk key on the NUMBER-PAD).
Click here to continue on the next page. To revert to this page use your browser's Back button.
back to the start • text-only version • other tutorials • getting started with Templot • Templot main page
© revised 30-12-00