| This tutorial is over 20 years old, it is completely out of date, and is shown here for interest only. Please refer to the Templot Companion User Guide for current information. |
Page 6. Click here to skip this page : next page
screen 42:
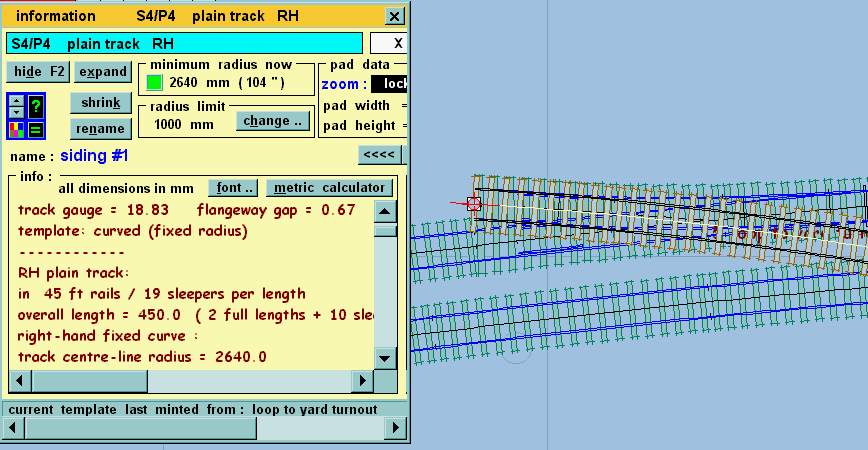
Screen 42: Templot shifted the plain track template onto the notch, thus aligning its fixing peg with the one on the turnout below. Unfortunately Templot had to guess which way we wanted it to be aligned, and got it wrong. This is simply corrected, just press MULTIPLY again.
screen 43:
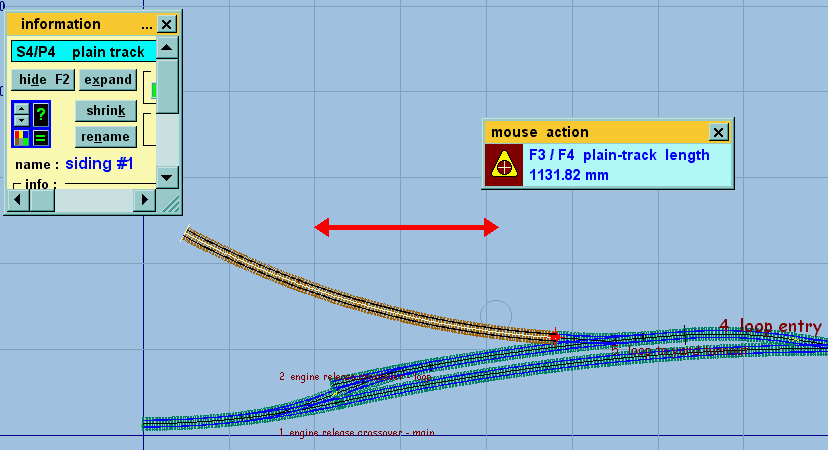
Now we can adjust its length as required. F3 mouse action as before (screen 43).
screen 44:
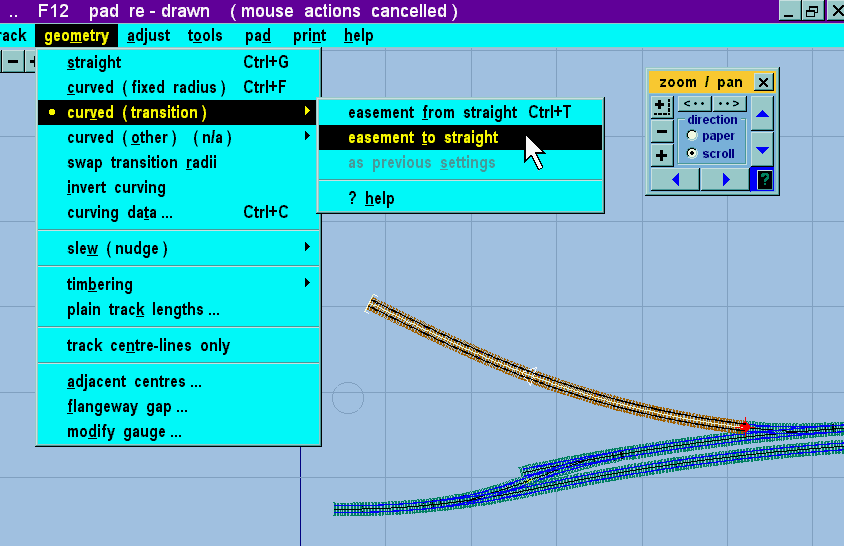
In screen 44 it is time to play with transition curves. Click the geometry > curved (transition) > easement to straight menu item. The template gains a transition zone indicated by special marks in which the radius is progressively increased to dead straight at the end.
screen 45:
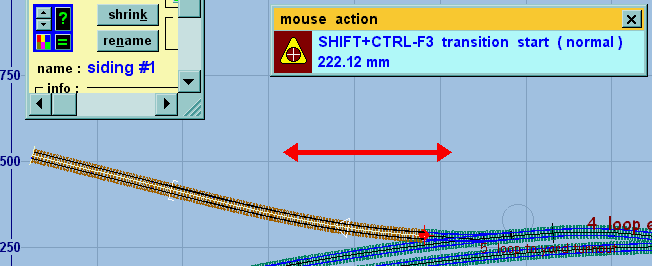
First try moving the transition zone back, so that there is more straight length at the end (screen 45). SHIFT+CTRL-F3 move transition start mouse action. Experiment with the other mouse actions to change the zone length, and to adjust the radius at each end of it.
Click transition curves to read the notes about transition curves and how to use the mouse actions to adjust them.
When you have the siding how you want it, put it on the background (control > store & background again).
screen 46:
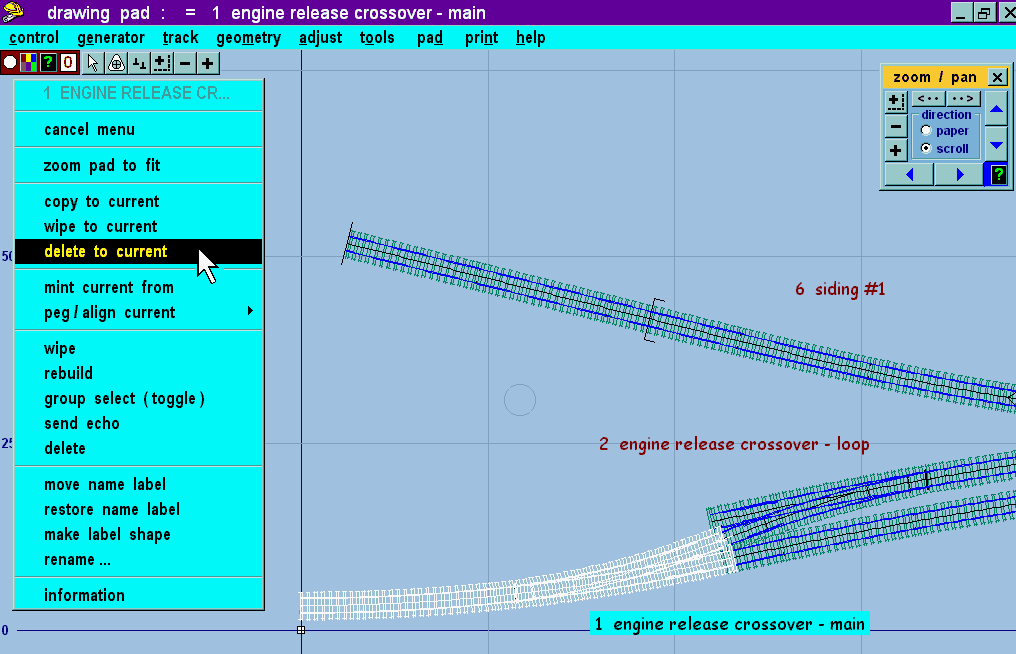
We are still concerned about the rather sharp radius in the first engine release turnout, and looking at the plan as it has now developed this turnout doesn't look right (screen 46). We need to to something about it, so we must copy it back to the current template. We decide that we won't want it again, so we can delete the stored background template at the same time.
Click anywhere on the template to highlight it as shown. Then on the pop-up menu which appears click delete to current.
screen 47:
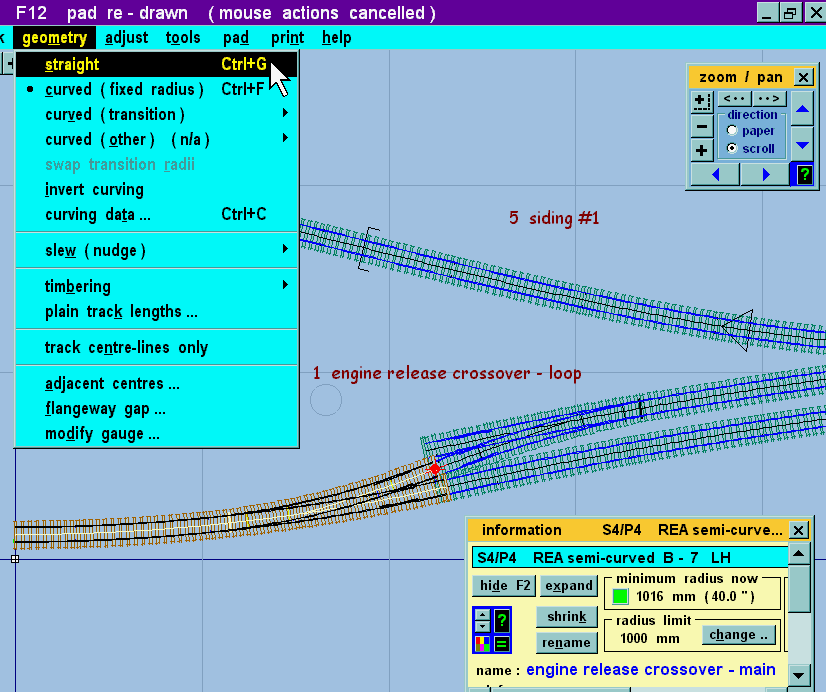
The easy solution is to make it a simple straight turnout. So having checked that its peg is in a position to lock it to the existing track, click the geometry > straight menu item (screen 47).
screen 48:
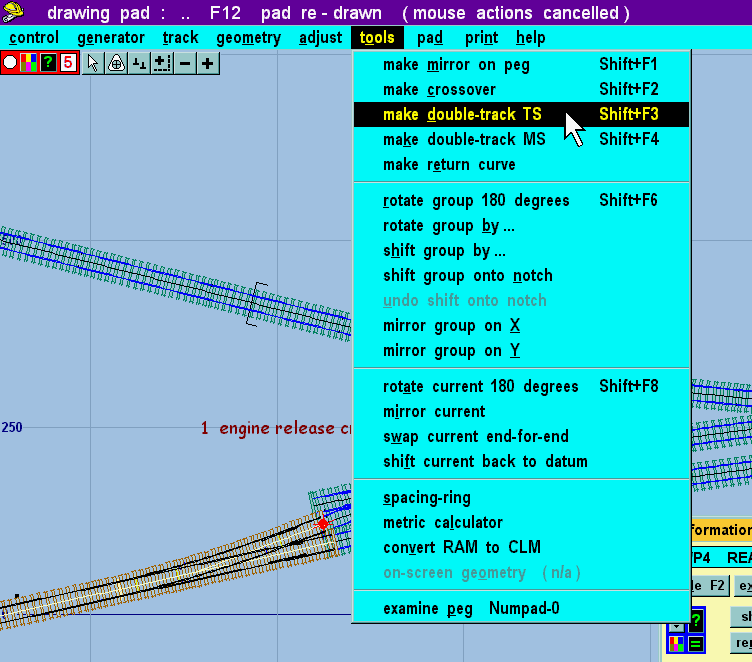
That seems satisfactory, so it's now very easy to make the end track for the loop and put this straight turnout on the background at the same time (screen 48).
Click the tools > make double-track TS menu item.
screen 49:
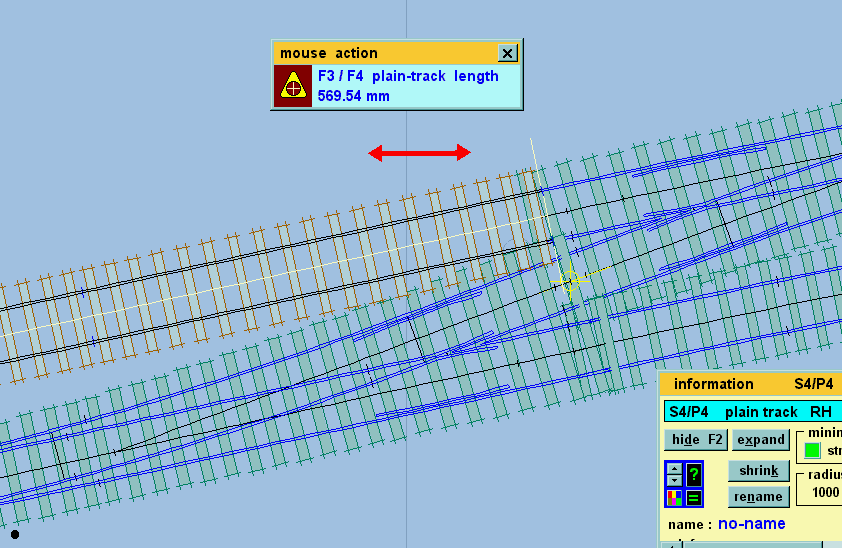
Then tidy the join if necessary using the F3 mouse action again (screen 49).
As you can see, I have not yet named this template.
Call it "loop end spur" and then put it on the background.
Click here to continue on the next page. To revert to this page use your browser's Back button.
back to the start • text-only version • other tutorials • getting started with Templot • Templot main page
© revised 30-12-00