Templot Club forums powered for Martin Wynne by XenForo :

TEMPLOT 3D PLUG TRACK - To get up to speed with this experimental project click here.   To watch an introductory video click here.   See the User Guide at Bexhill West.

  • The Plug Track functions are experimental and still being developed. Some of the earlier pages of this topic are now out-of-date.

    For an updated overview of this project see this topic.   For some practical modelling aspects of using Plug Track see Building 3D Track.

    The assumption is that you have your own machines on which to experiment, or helpful friends with machines. Please do not send Templot files to commercial laser cutting or 3D printing firms while this project is still experimental, because the results are unpredictable and possibly wasteful.

    Some pages of this and other topics include contributions from members who are creating and posting their own CAD designs for 3D printing and laser-cutting. Do not confuse them with Templot's own exported CAD files. All files derived from Templot are © Martin Wynne.
  • The Plug Track functions are experimental and still being developed.

    For an updated overview of this project see this topic.   For some practical modelling aspects of using Plug Track see Building 3D Track.

    The assumption is that you have your own machines on which to experiment, or helpful friends with machines. Please do not send Templot files to commercial laser cutting or 3D printing firms while this project is still experimental, because the results are unpredictable and possibly wasteful.

    Some pages of this and other topics include contributions from members who are creating and posting their own CAD designs for 3D printing and laser-cutting. Do not confuse them with Templot's own exported CAD files. All files derived from Templot are © Martin Wynne.

Scaleforum 2023 follow-on

Quick reply >

GSM

Member
Location
london
https://85a.uk/templot/club/index.php?threads/getting-started-with-3d-plug-track.722/

Very helpful indeed Martin. As possibly you may recall I have been a keen Templot user since at least 2000. However, this last weekend a revelation at scaleforum High Wycombe. This fantastic new aproach. It is more than welcome and I am jumping right in. I have been 3Ding for some few years now and my Ender 3 is getting a but tired but with new belts wheels and TLC has much life yet. A resin printer of my own is coming- can’t use other peoples for ever - The question is is anyone producing an idiot guide to starting with the system in need of a name? Particularly which STL editing software is most effective in editing to bed size and custom “links “ between segment printed separately. And more generally experience for the starter, I don’t say beginner as Templot experience and general 3D use is a pre requisite. I see lots and lots of input and except ideas and feed back. However, it is too much for a simpleton to take in and get a leg up in starting.

George Morris
 
_______________
message ref: 7883
Hi George,

Two things,

Firstly an idiots guide was a popular request at Scaleforum. This particular idiot is very keen to help with producing such a guide.
Now that Scaleforum is out of the way I'm happy to co-ordinate such a thing to ease the pressure from Martin.

Secondly, I did try to explain over the weekend that no CAD skills are required and an STL editor is simply not necessary. The genius of Plug Track is that that Martin has built all of that into Templot, and the user doesn't have to worry about it at all.

As long as the user knows what they want and checks the necessary boxes, Templot will give you a file which can be saved onto a USB stick and fed directly to the printer.

Your questions however are perfectly valid and if we had a quick-start guide you wouldn't need to ask them, you'd be straight onto the good stuff. :)
That said, if Martin were to write a thorough manual as he went along we wouldn't have Plug Track at all.
We have it only because Martin has dedicated himself to the task of creating it.

Martin and I have corresponded briefly on the subject of a user guide, and I hope he wont mind me saying that he is keen for support with it. I'm happy to speak with Martin (and others) on the subject and I am certain that something very useful could be put together in the next few weeks.
Progress will be posted on the Templot Club, do keep coming back for updates.
 
_______________
message ref: 7891
@James Walters

Hi James,

(y)

Many thanks for helping to spread the word. And the load.

There's a Zoom meeting on Wednesday where we can all chat more about Scaleforum and the way forward.

Or it can be moved to any other day if more convenient.

cheers,

Martin.
 
_______________
message ref: 7893
I must remember the zoom meeting! The jet lag (-5 hours)/ train lag (4 time zones in 4 days each an hour less than the one before). The good thing was that although I woke up later than planned on Sunday, I did make Scaleforum only slightly later than planned.
 
_______________
message ref: 7895
@James Walters

Hi James,

(y)

Many thanks for helping to spread the word. And the load.

There's a Zoom meeting on Wednesday where we can all chat more about Scaleforum and the way forward.

Or it can be moved to any other day if more convenient.

cheers,

Martin.
Whow. Great to see such enthusiasm and support, I can’t Wait to get stuck in had some playing about this evening and printing some tips and a trial jig . Next step to try timbers at a size that fits my printer . PLA as a try out probably ABS for production . Chairs I will get them done in resin. Then set up my own printer when it comes. In the mean time more reading of all the information and experimenting to do thanks for all the support and I am looking forward to giving back experience in time

George
 
_______________
message ref: 7900
Last edited:
After a week of evenings. I have some rail filing jig that are working well. Tweezers set up and a few files to play at setting bricks. Next to actually produce the bricks and try a print or two. Not got the brick production and exported STL sorted correctly yet. A but if frustration. But as ever Percy Everence is your friend. Also resin printer has arrived, but still boxed until I get a PLA timber brick printed to my satisfaction

George
 
_______________
message ref: 7983
I've been trying to understand plug track since seeing James Walters at Scaleforum. I've managed to work out how to get a template to produce chairs but I can't see how I output the chairs as a suitable rectangular group for printing. I'm obviously missing something simple. Is there a basic 'walk-through' demonstration somewhere I've missed?
thanks
David Barham
 
_______________
message ref: 8074
HI David,

You have to define a raft shape, by drawing a rectangle around the chairs you want to 'capture'.

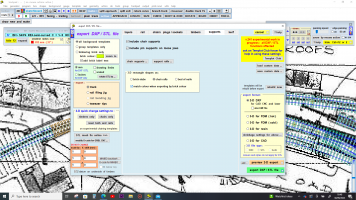
Then in the stl/dfx output dialog under the 'supports' tab, select chair rafts under '3d rectangle shapes as:'

Knowing that you are very computer savvy, I'm sure this will be enough to get you going for now. If you need help with drawing the rectangle shape, let us know and one of us will help you out.

Tip: Let's say you are doing a piece of plain track, you can reduce the timber spacing and gauge to compress the chairs into a more manageable block. I think you'll be able to work this out for yourself. If not drop me an email. I can do a video walk-through.

Like everything in Templot, once you've got the hang of it it's easy.

More detailed instructions/tutorials are on their way, but for now you're not on your own. Everyone is here to help.

All the best,

James
1696088790324.png
 

Attachments

  • 1696088505869.png
    1696088505869.png
    465.7 KB · Views: 61
_______________
message ref: 8075
Once again, with a little more detail this time. :)

1. Draw a rectangle around the chairs you wish to print using the rectangle tool in the shapes control box.
1696089084130.png

2. Set up the STL/DXF output controls as per the image below. Be sure to select 'Chairs Only', and 3D - for resin under 'export format'.
Follow the instructions on-screen. I prefer the 3d Builder mesh-fix option. If you haven't got 3d Builder installed it's worth getting IMO, (free download)
1696089194022.png


3. The file will open in 3d Builder. Click Import, then click the spanner icon to fix the mesh. Then click save. It will save the fixed files into the STL-Fixed folder of your Templot installation. From there you can print the chairs.
1696089396690.png

As alluded to above, there are lots of other control to play with which will compress the chair bunch,, but for now this will get you going.

:)
 
_______________
message ref: 8076
Just to add, if you are going for the loose jaw option (why wouldn't you?), then you will need to export the chairs and loose jaws separately, i.e. you'll end up with two files. This is good, as your carpet will consume more jaws than chairs. :)
 
_______________
message ref: 8077
I've been trying to understand plug track since seeing James Walters at Scaleforum. I've managed to work out how to get a template to produce chairs but I can't see how I output the chairs as a suitable rectangular group for printing. I'm obviously missing something simple. Is there a basic 'walk-through' demonstration somewhere I've missed?
thanks
David Barham
@barhamd

Hi David,

Welcome to Templot Club. :)

(You've been a member for a couple of years but I think this is the first time we have heard from you.)

If you look in the chair jaws options:


chair_jaws_options.png


you will see that some chairs are coloured blue and some are coloured red.

The blue ones are interchangeable in any corresponding position on any template (of the same gauge and scale). They can therefore be printed in bulk to keep in stock. They can be bunched together on a raft of chairs by reducing the track gauge and overlaying multiple templates. It's best to have only two rows on a raft, so that you can get at them with the cutters to remove them from the raft. For best printing results, keep the rafts below about 1500 sq.mm. each, and clone multiple copies on the printer plate with gaps between them:

chair_jaws_chitu.png


Those are L1 bridge chairs in 4mm/ft scale with pin slots for loose jaws.

The red chairs in the list are not interchangeable, and nor are the loose jaws for each one. They are all specific to one particular template, and the loose jaws to one particular chair. They are therefore printed as needed for each template by drawing a raft rectangle around them on the template.

Raft rectangles are drawn in the background shapes functions as normal rectangle shapes.

All this stuff is still a work in progress and subject to change. We are working towards getting a detailed user guide done, but we are not there yet. Ask again if you get stuck.

cheers,

Martin.
 
_______________
message ref: 8078
thanks Martin, I used Templot when building my P4 model of Clare and using a laser cutter to mark out the cork underlay before laying the track on top was a game changer!

I'm still not seeing how to export the chairs in a format I can get to a suitable 3D print. I only seem to be able to get the chairs laid out per the track template and an STL which contains all the chairs as a single object. Also I'm seeing the chairs but not the loose-jaw bit?
I guess I'm just not choosing the right option but I can't see what I should be choosing.
thanks
David
1696092831521.png
 
_______________
message ref: 8079
1696093460879.png


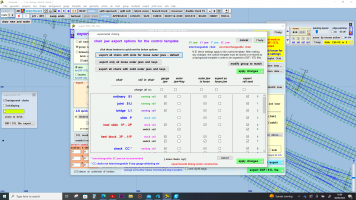
In the export DXF/STL dialogue, under chairs plugs & sockets, you'll see the experimental chairing dialogue.
By default, you'll get the chairs without the loose jaws. You can see the default option 'export all chairs with slots...etc.) is selected in the image above.
When you've exported the chairs, you can repeat the process, but next time round choose 'export only all outer jaws and keys'. This will give you your second .stl file.

As for making them fit onto the printer bed. You'd be best to use the rectangle brick raft mentioned above and split the chairs into useful bunches, such as crossing chairs, CC left, CC right, Slide chairs etc. My explanation above possibly wasn't clear enough, I'll do a proper job of it later. I'm presently scribbling between jobs.

I hope that helps.
 

Attachments

  • 1696093222110.png
    1696093222110.png
    387 KB · Views: 59
_______________
message ref: 8080
@barhamd

Hi David,

You can't export the track plan templates as they stand. Nothing fits on the build plate, and if it did you would waste a lot of space.

The idea is to copy the templates into smaller partial templates containing just the chairs you need, and for many of them to overlay a second copy shifted half a timber space (approx 5mm in 4mm/ft scale) to bunch the chairs for production.

It's important to grasp that the methods used for the interchangeable chairs (which are the majority of chairs in a turnout) differ from the methods used for the special chairs. Generally you don't make both at the same time -- although you can if you want to. There are dozens of options and settings to cater for different requirements.

It's really too much to explain in a single reply. I will make a video soon. It would have been better if Scaleforum had been a month later and we could have got more explanations done in advance. We are now trying to catch up. It is only a month or two since I got all the V-crossing chairs done, and only a few weeks since I finished the filing jigs. There will also be some changes to the user interface in a few days time in update 241c, so I will make the video using that, otherwise it will be out-of-date before the ink is dry. :)

cheers,

Martin.
 
_______________
message ref: 8081
Thanks Martin
I understand that this is all very experimental and I wouldn't want to slow up the excellent progress by asking too many damn fool questions! I'll wait a while and watch with interest to see how things progress.
David
 
_______________
message ref: 8085
Hi Martin, this formation is going well, thank you.

I am interested in plug track but don't understand all the different topics yet to know where best to answer totally beginner questions without messing up the flow in the different topics. So I will try here as you kindly responded before.

My son is asking me to go halves with him on a Mars 4 resin printer. He will use it for printing figures and I could use it for making the chairs. It sounds like it will be very capable of making the chairs. What sort of resin should or could I be asking him to buy with his order for the chairs. I think I read that already in one of the posts but I cant find it again. Perhaps I can just use whatever he is using for his figures. I will find out what that is. Do you think the application is tolerant of several different resins ?

Also in OO what height is the assembled track ? I realize you must have it set to provide enough mating surface for the plugs on the chairs and wholes in the timbers. I ask as I have 65% of my track laid already, about 4mm to rail top.

Does the rail top stay nice and flat ? I had wondered if the friction fit of the plugs in the timbers occasionally found a tight spot that wont press down fully and lead to a crest in the rail ? I assume not or you wouldn't be pursuing it but it would be nice to know for sure.

I understand I will need a filament printer or some other solution for the bases and will keep reading the posts.

Is the zoom call appropriate for total novices if I keep quiet ?

Thanks, Tom
 
_______________
message ref: 8201
@Tom King

Hi Tom,

The Mars 4 printer will be fine for the chairs. Some other members have Mars 4 printers, and other Mars printers.

The resin needs to be one which has some reslience -- not too brittle. Many of the standard resins are quite brittle, so not ideal for chairs. The resin we have been using is called ABS-Like. There are several makes, but we have recently found this one which is excellent and allows the prints to be washed in water:

https://www.amazon.co.uk/gp/product/B0C7BFQZ2C

You can get £8 discount if you click the Voucher button. One bottle is enough to make thousands of chairs in 4mm/ft scale.

Your son might find that it works well for figures too, to save the faff of changing resin on the printer.

The default plug track height to the rail top in 00 is about 5.65mm from the underside of the timbering base (see below). If flexi-track is used the intention is that it is packed up to that level using card or cork. If you have already laid some 00 track which is lower, maybe you can cut away the cork or underlay under areas of plug track?

It is possible to change the settings and make plug track which is lower to rail top, but there are a lot of ifs and buts. It would make it very difficult, bordering on impossible, to use the loose outer jaws option. You would need to use the solid one-piece chairs. That might be ok for plain track, but for pointwork it makes assembly more difficult -- unless you copy the Finetrax kits and make the wing rails in two parts with a break at the knuckle.

Also with lower track the clip-fit chairs won't work and you would need to make them press-fit, or glue them in place.

Usually the chairs seat snugly down on the timbers all nicely level. This is almost guaranteed with the clip-fit chairs. With press-fit as an interference fit you might find one or two don't want to go fully home, but that is solved by placing a block of hardwood on the rail top and giving it a sharp tap with a pin hammer. Alternatively you can change the settings to make an easier press fit, but then you might find that one or two are a bit loose and need gluing.

Generally the clip-fit are much the easiest to use and just clip into place in the sockets. But they do need the full height track to work.

In your position I would try to find a way to use the full 5.65mm track to get the full benefits of plug track and the easiest assembly.

Yes, you and everyone are very welcome to join the Zoom meetings, and there is no need to keep quiet. :) Your son might like to join in too if he has any questions about 3D printing railway track.

Default plug track heights, code 75 rail:

with 3mm plywood base: 5.5mm
with 1/8" plywood base: 5.7mm
with FDM printed base: 5.65mm

cheers,

Martin.
 
_______________
message ref: 8204
Hi Tom,
When you say 4mm to rail top, where are you measuring from?
The bottom of your sleepers/top of your underlay?
re you using cork underlay?
If so what thickness?
Steve
Thanks very much Steve. Yes I meant 4mm from top of cork to top of rail for the track I already have installed.

I read Martin's reply too about clip fit needing full height. I could use thinner cork under the plug track (or something else) to match the rest of the layout, or I could experiment with press fit. Many thanks for your and Martin's work on this. It looks extremely interesting.
Tom
 
_______________
message ref: 8206
I now have a half share in my sons Mars 4 resin printer. We have made our first failed print and first successful print, a small figure.
As I don't have a filament printer, is there any reason the resin printer couldn't print the timbers too ? Just to experiment with the timbers and chairs ? I accept that the build area is limited, but it would get me started. He has plant based grey Elagoo resin in the tank. I am guessing that may be fine for timbers ? I have some ABS like resin on the way for chairs.
 
_______________
message ref: 8517
I have managed to print timbering bases on my Mars 2 pro just for testing & experimenting.
I found I had to increase the depth of the timbers to compensate for the elephants foot effect at the bottom of the sockets. This was with elegoo abs-like resin ipa washable.
If you print a base with default timber depth settings, measure the the xyz dimensions & compare with ecpected.

Having some timber bases will let you practice chair & jaw insertion.
Good luck
Steve
 
_______________
message ref: 8518
Hi Martin
3D printed track is a game changer for me. I have been using templot (which is brilliant) to build my model railway using the old copper clad and solder method to produce the points (to keep costs down). After James review of the 3D resin printer, I have now one on order so should arrive soon.

Many thanks Martin and also to James.
 
_______________
message ref: 8521
I managed to build my first plug-track V as an experiment.

This was a 1:5 V in P4.

Sleepers printed in ABS at .2 layer height on a Creality Ender 5.
Chairs etc on a Phrozen Sonic mini 4K at .035 layer height in Phrozen Aqua Grey resin

The chairing looks really nice but you do need to get your resin dialed in as if it is over exposed the holes in the chairs tend to be too tight for the loose jaws.

I have the rest of the point ready to construct so I so looking forward to putting it all together.

aIMG_0578.jpg


I soldered the V before inserting into the plug-track. I made a simple V holding jig which holds the rail at the right angle while I solder the rails. The solder joint is far enough away from the 3D printed material that the heat doesn't cause it a problem.

aIMG_0579.jpg


The process to generate the 3D files takes a bit of getting your brain around but the results are definitely worthwhile.

Thanks Martin!

David
 
_______________
message ref: 8751
Sleepers printed in ABS at .2 layer height on a Creality Ender 5.
Chairs etc on a Phrozen Sonic mini 4K at .035 layer height in Phrozen Aqua Grey resin

The chairing looks really nice but you do need to get your resin dialed in as if it is over exposed the holes in the chairs tend to be too tight for the loose jaws.
@barhamd

Hi David,

Looking good!

Did the clip-fit chair plugs work ok? Generally I work at 0.12mm layer height and the default Z dimensions are all based on that. Which slicer did you use?

If the loose jaw pins are tight in the slots the first thing to check is the print washing. It needs to be really vigorous with much plunging up and down in the wash to force it through the slots. Any residual resin in the slots will make it difficult to insert the pins. But if still no joy you can change the pin clearance dimensions by clicking the chair loose jaws... button on the chairs plugs/sockets tab. P.S. these settings are not yet included in the custon data file, so would need to be entered each time.

Most of us have been using the ABS-Like resins for the chairs, and PLA Plus toughened filament for the tiimbering. How did printing the timbering in ABS go? Did you need to make any changes to the shrinkage settings? Have you checked the finished track gauge for P4?

cheers,

Martin.
 
_______________
message ref: 8753
Hi David,
Well done.
I hope you don't mind me pointing out that because you have soldered your vee before assembly, the point rail has not gone into the A ( or isit AA) chair far enough.
Next time try to assemble without soldering and you will see what I mean.
Is that a Left hand or a right hand by the way?
Steve
 
_______________
message ref: 8765
Hi David,
Well done.
I hope you don't mind me pointing out that because you have soldered your vee before assembly, the point rail has not gone into the A ( or isit AA) chair far enough.
Next time try to assemble without soldering and you will see what I mean.
Is that a Left hand or a right hand by the way?
Steve

Steve is it a Y turnout?

As for the tip not being fully fitted up to the chair, I think the spliced rail has been soldered to close to the tip of the main rail, as there seems to be a bit of a step

One of the things I will try when I am up and running will be to solder the joint after fitting with 100 degree solder just to keep all together and to aid electrical conductivity (I guess separate dropper wires would do the same thing) plus 1 hole through the boards. Old habits I guess. I think we will all come to our own preferred build processes as we have done with other methods
 
_______________
message ref: 8766
I managed to build my first plug-track V as an experiment.

This was a 1:5 V in P4.

Sleepers printed in ABS at .2 layer height on a Creality Ender 5.
Chairs etc on a Phrozen Sonic mini 4K at .035 layer height in Phrozen Aqua Grey resin

The chairing looks really nice but you do need to get your resin dialed in as if it is over exposed the holes in the chairs tend to be too tight for the loose jaws.

I have the rest of the point ready to construct so I so looking forward to putting it all together.

View attachment 7542

I soldered the V before inserting into the plug-track. I made a simple V holding jig which holds the rail at the right angle while I solder the rails. The solder joint is far enough away from the 3D printed material that the heat doesn't cause it a problem.

View attachment 7543

The process to generate the 3D files takes a bit of getting your brain around but the results are definitely worthwhile.

Thanks Martin!

David


David

A very encouraging post, thanks for sharing
 
_______________
message ref: 8767
I managed to build my first plug-track V as an experiment.

This was a 1:5 V in P4.

Sleepers printed in ABS at .2 layer height on a Creality Ender 5.
Chairs etc on a Phrozen Sonic mini 4K at .035 layer height in Phrozen Aqua Grey resin

The chairing looks really nice but you do need to get your resin dialed in as if it is over exposed the holes in the chairs tend to be too tight for the loose jaws.

I have the rest of the point ready to construct so I so looking forward to putting it all together.

View attachment 7542

I soldered the V before inserting into the plug-track. I made a simple V holding jig which holds the rail at the right angle while I solder the rails. The solder joint is far enough away from the 3D printed material that the heat doesn't cause it a problem.

View attachment 7543

The process to generate the 3D files takes a bit of getting your brain around but the results are definitely worthwhile.

Thanks Martin!

David

Hi David

You have an apparent misalignment between the V rail (green line) and wing rail (red line). It looks like the V hasn't gone in far enough.

Cheers,
Paul
aIMG_0578.jpg
 
_______________
message ref: 8771
Hi John (and David)
Perhaps we should all take Martin up on his solder paste offer!


In fact I will do that now!

Hi Martin,
Can I take you up on your solder paste offer please?
Steve


Steve a very good idea and one I was going to take up with Martin

I think I will need to take things in baby steps as quite a lot goes well over my head.

So as not to confuse numpties like me separate threads for FDM and resin printers would be less confusing

As for the sanding blocks I have two cork ones and I think a red plastic one with a metal abrasive surface
 
_______________
message ref: 8791
So as not to confuse numpties like me separate threads for FDM and resin printers would be less confusing
@Hayfield

Hi John,

FDM printing is easy and enjoyable. No mess, no smell, no smoke, no faff with washing and curing. Just set it going, and start building a wagon kit or painting the garden fence or whatever. Before the paint is dry you will hear a bleep from the printer and there it is, job finished. Another 10 minutes while it cools down and you can just lift it off by hand, ready to use.

As soon as you have your printer I will help you get going. There are a few things to set up initially, but once it is done that's it. The next jobs will take just minutes to set going.

At present the most time-consuming process is in Templot splitting the template and adding the connector clips. That's unavoidable for complex formations, but for individual single turnouts I am going to make it easy and quick with just a couple of clicks. Just as soon as I can draw breath from everything else. In the meantime I will do it for you for the Kingroon, if you say what turnout you want.

cheers,

Martin.
 
_______________
message ref: 8798
Back
Top