Search
- Location
- West of the Severn UK
- Info
- .
Enjoy using Templot?
 Thanks.
Please do not send requests for help direct to me via email.
Post your questions on the forum where everyone can see them and add
helpful replies.
@Phil G
Hi Phil,
STL file attached below. It's mesh-fixed ready for printing.
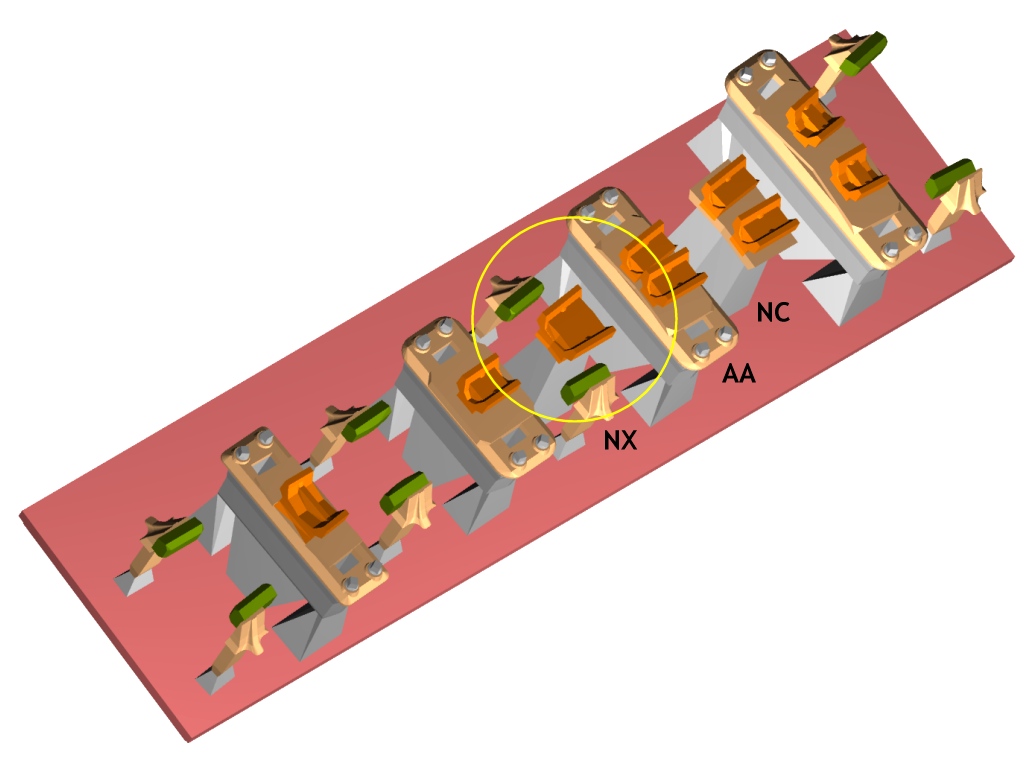
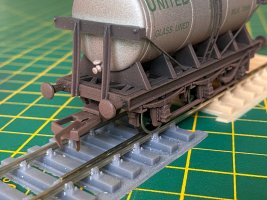
I think we may be over-thinking the need for adhesive/solder. The chair is quite firm in holding the vee nose down level and in correct alignment. The only need is to prevent the rail from sliding out of position. That doesn't have to be done at the nose, it can be done at any of the other chairs -- with some superglue on the loose jaws for example.
For those who prefer to build on the bench and are able to access the underside of the track after assembly, there are several sealing and securing methods which might be used. For example I have previously mentioned using old Humbrol enamel paint as an effective long-term sealant between the plugs and FDM sockets. Or any other old enamel paint from the back of the shed -- I doubt modern water-based paints will work the same way.
But for those who prefer to build track in situ on the baseboard, it's not so easy. I suspect that mostly means users of plywood timbers. Whatever, after junking any idea of using epoxy putty, next time I shall probably put a tiny spot of Humbrol enamel in the AA chair before inserting the rail. You can't get any slower-setting than that -- it needs to be left at least a fortnight to see if it has worked.") So it's easily removed, wiped off and start again if you are not happy with it.
So it's easily removed, wiped off and start again if you are not happy with it.
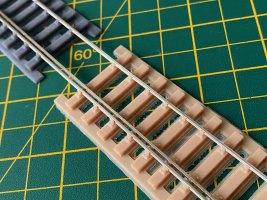
This is the raft of chairs in the STL, for a 1:5 LH crossing in EM/00-SF. The gap is because of the missing BB chair (not yet done):

It's rather wasteful of resin because it is simply a straight export from the templates without any bunching or bulk printing. For each chair I added the matching loose jaws alongside it by shifting the template by one timber-width and changing the chair settings:

If you don't mind wasting resin it is a quick and easy way to do it, and has the great advantage that the chairs are laid out in their proper order with their required loose jaws. Which avoids any confusion or the need for much labelling other than a note on the back of the raft as to which template they are for.
I managed to get 6 of them on the Mars build plate:

It could possibly have been 7, but it's important not to get the rafts too close together to avoid excessive suction against the FEP film. In the real world you would have chairs from several different templates of course.
The above printed fine with no loose bits left in the tank:

The slicer said the total cost of the resin was 30p. So that's 5p for a full set of chairs for a 1:5 crossing. Maybe there's not much to be gained by trying to save resin by bunching more chairs into the available space, with the potential confusion about which is which. For the above method it's easy to identify them -- just place the raft on the printed paper template. It's still more economical than some 3D printing projects I have seen where the actual part is supported by a huge resin structure which is all scrap.
It's important when washing these chairs for loose jaws to plunge the build plate up and down in the washer tub a few times, rather than simply relying on the rotary machine swirl. Plunging forces the wash through the tiny slots for the loose jaw pins. When I forgot to do the plunging I found several slots clogged with some hardened surplus resin which had failed to wash out even after several minutes in the washer. The slots are tiny and deep, so a bit of a challenge for the washer alone.
At first sight one way to save resin would be to user shorter support pyramids under the chairs. But there is a reason they are that size -- we need to get the blue cutters round them to remove the chairs from the raft. That's also the reason for not having more than 2 rows of chairs on a raft:


I wanted to check that these larger chairs can be removed easily with the existing pyramid top sizes. It's important to make a clean cut to avoid any roughness remaining on the plug bottoming in the sockets. But it cut fine. These are the standard Chinese blue cutters which are supplied with the printers. I have several pairs now.
The loose jaws don't need cutters -- they can be broken off the raft in the fingers or pulled off the raft using the special tweezers.
cheers,
Martin.
Hi Phil,
STL file attached below. It's mesh-fixed ready for printing.
I think we may be over-thinking the need for adhesive/solder. The chair is quite firm in holding the vee nose down level and in correct alignment. The only need is to prevent the rail from sliding out of position. That doesn't have to be done at the nose, it can be done at any of the other chairs -- with some superglue on the loose jaws for example.
For those who prefer to build on the bench and are able to access the underside of the track after assembly, there are several sealing and securing methods which might be used. For example I have previously mentioned using old Humbrol enamel paint as an effective long-term sealant between the plugs and FDM sockets. Or any other old enamel paint from the back of the shed -- I doubt modern water-based paints will work the same way.
But for those who prefer to build track in situ on the baseboard, it's not so easy. I suspect that mostly means users of plywood timbers. Whatever, after junking any idea of using epoxy putty, next time I shall probably put a tiny spot of Humbrol enamel in the AA chair before inserting the rail. You can't get any slower-setting than that -- it needs to be left at least a fortnight to see if it has worked.
So it's easily removed, wiped off and start again if you are not happy with it.This is the raft of chairs in the STL, for a 1:5 LH crossing in EM/00-SF. The gap is because of the missing BB chair (not yet done):
It's rather wasteful of resin because it is simply a straight export from the templates without any bunching or bulk printing. For each chair I added the matching loose jaws alongside it by shifting the template by one timber-width and changing the chair settings:
If you don't mind wasting resin it is a quick and easy way to do it, and has the great advantage that the chairs are laid out in their proper order with their required loose jaws. Which avoids any confusion or the need for much labelling other than a note on the back of the raft as to which template they are for.
I managed to get 6 of them on the Mars build plate:
It could possibly have been 7, but it's important not to get the rafts too close together to avoid excessive suction against the FEP film. In the real world you would have chairs from several different templates of course.
The above printed fine with no loose bits left in the tank:
The slicer said the total cost of the resin was 30p. So that's 5p for a full set of chairs for a 1:5 crossing. Maybe there's not much to be gained by trying to save resin by bunching more chairs into the available space, with the potential confusion about which is which. For the above method it's easy to identify them -- just place the raft on the printed paper template. It's still more economical than some 3D printing projects I have seen where the actual part is supported by a huge resin structure which is all scrap.
It's important when washing these chairs for loose jaws to plunge the build plate up and down in the washer tub a few times, rather than simply relying on the rotary machine swirl. Plunging forces the wash through the tiny slots for the loose jaw pins. When I forgot to do the plunging I found several slots clogged with some hardened surplus resin which had failed to wash out even after several minutes in the washer. The slots are tiny and deep, so a bit of a challenge for the washer alone.
At first sight one way to save resin would be to user shorter support pyramids under the chairs. But there is a reason they are that size -- we need to get the blue cutters round them to remove the chairs from the raft. That's also the reason for not having more than 2 rows of chairs on a raft:
I wanted to check that these larger chairs can be removed easily with the existing pyramid top sizes. It's important to make a clean cut to avoid any roughness remaining on the plug bottoming in the sockets. But it cut fine. These are the standard Chinese blue cutters which are supplied with the printers. I have several pairs now.
The loose jaws don't need cutters -- they can be broken off the raft in the fingers or pulled off the raft using the special tweezers.
cheers,
Martin.
Attachments
message ref: 6971