@Paul Boyd
I'm pleased to report 100% success with the Anycubic water-washable ABS-Like resin.
I ignored the recommended resin settings and used the exact same settings I've been using on the Mars and Alkaid printers with the Elegoo resin. The recommended settings were for Anycubic printers, and since I don't have one of those, there didn't seem much logic in sticking to them.
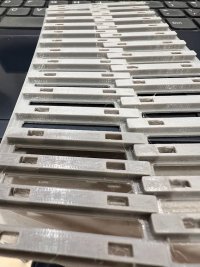
Printed on the Mars I can't detect much difference from the Elegoo resin in the finished chairs. The pins fit nicely in the slots, and the clip-fit tangs open and close when compressed in the digital caliper. The rafts and chairs feel equally strong to handle.
The only differences are:
1. slightly darker grey and less translucent than Elegoo. This is a good thing I think -- easier to paint and photograph. But I gave it a longer cure in the Mercury unit (18 minutes in total) to allow for being less translucent.
2. as claimed by Anycubic, there is less shrinkage than the Elegoo resin, resulting in the chairs being fractionally larger than the design size. This presents a problem in setting the default shrinkage in Templot, if folks will be using different resins. You can enter any shrinkage you like, but measuring it to enter is tricky. The shrinkage is however far less than the specs for both resins, when making chairs. It's likely more applicable if resin-printing full thick timbering.
I note on the Anycubic web site that this resin will withstand 3 years of outdoor exposure unpainted, without cracking. Which is more good news. What happens after 4 years it doesn't say. I think I would paint it anyway.
A bowl of used wash water is now outside waiting for the sun to come out.
The only bad news in all this is that I have a new unopened bottle of Elegoo resin in the cupboard.

Martin.
 Search