@Paratom
Hi Thomas,
Thanks.
There is no such thing as a 4-
bolt chair, despite being commonly so-called by modellers. A bolt is a 2-part threaded fastener having a separate nut. The GWR used 2-bolt chairs for plain track (inserted from below with the nuts on top), but all other chairs (including for pointwork on the GWR) are fixed using
screws from above which bite into the wood rather than passing through it.
The REA* chair designs from 1925 which I have so far used for plug track use 3 screws for plain track (S1 and S1J chairs), and 4 screws for all pointwork chairs. See:
https://85a.uk/templot/club/index.php?threads/rea-chair-types-and-designations-in-plug-track.738/
The REA cast-iron chair designs for bullhead rail are still in use today, 100 years later, almost unchanged. Which compares with the plethora of fixings for flat-bottom rail which have been used in the last 70 years.
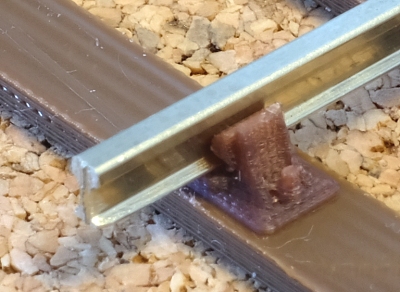
Some pre-grouping (pre-1923) railway companies used 4 fixings for chairs. This typically comprised one chair screw and one trenail at each end, diagonally opposed.
A trenail is a hardwood nail, usually with a domed top, driven into a smaller hole. The advantage of a wooden fixing is that it does not rust, and trenails are commonly found as fixings on historic timber-framed buildings. Chair screws nowadays are hot-dip galvanized (zinc-coated) to prevent rusting, so trenails are not needed and have fallen out of use.
I haven't yet done any 4-fixing pre-grouping chairs for plug track, although I intend to do some eventually. There were dozens of designs, so it will never be possible to do them all. However, you will be able to enter custom chair details, so it will be possible to have chairs matching any prototype design in general appearance.
If you have artwork for Midland Railway chairs I would be very pleased to see it. Thanks. However, it can't be incorporated directly into Templot because that is not how Templot plug track works.
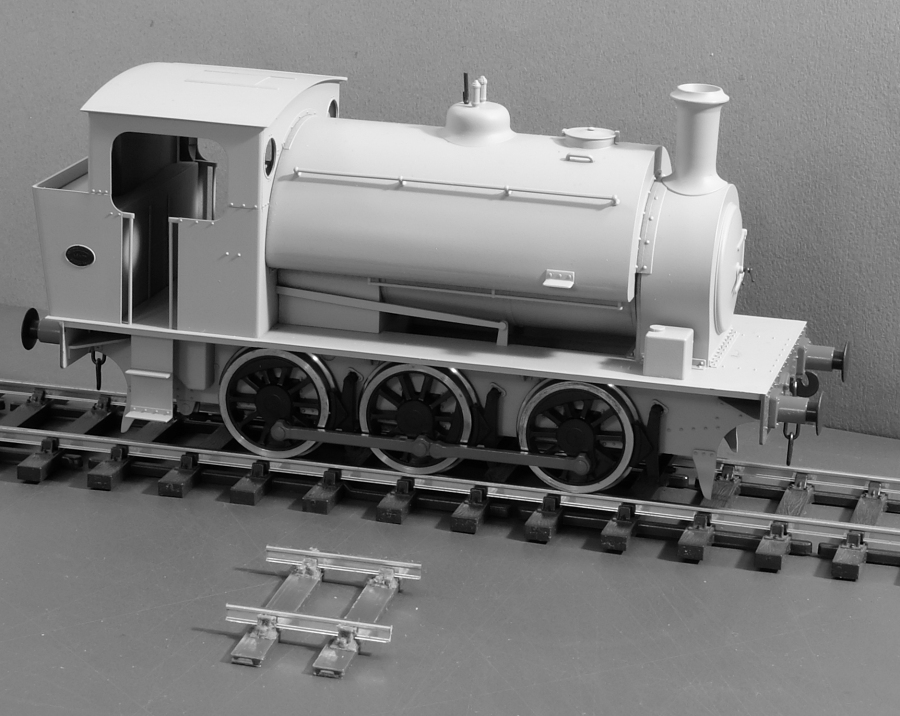
The chairs for plug track are each generated programmatically by Templot to fit where they are needed. They are stylised geometrical designs rather than a scale model of prototype chairs. That's because:
• All plug track rail is vertical for practical modelmaking, and the chairs are modified accordingly. Prototype check rails are vertical, but other rails are inclined at an angle of 1:20 to match the coning angle on the wheels (except the vertical flat-bottom pointwork designs used between 1970 and 2000). It is next to impossible to build model pointwork with inclined rail in the smaller scales, so we don't even try. If an inclined rail is curved or bent it needs to be held down with heavy fixings to prevent it straightening up.
• Many model scales and gauges use a significantly over-scale flangeway gap, which has to be incorporated into the design of the pointwork chairs. It also means that in some locations fictional chairs are needed which don't exist on the prototype. Likewise they use an over-scale switch opening, which has to be incorporated into the design of the slide chairs.
• Prototype chairs for pointwork fit the rail at specific locations only, and therefore require a timber under the rail at that location. In Templot there is a timber shoving function which allows the timbers to be moved from their prototype locations to avoid conflicts when trackwork is forced to fit in a cramped model space. When a timber is moved, the chairs it is carrying must be modified to fit the rails at the new location.
• Also in fitting model trackwork in a cramped space, modellers often need to use non-standard crossing angles for which no prototype chair exists. Templot generates such chairs at any desired crossing angle as needed.
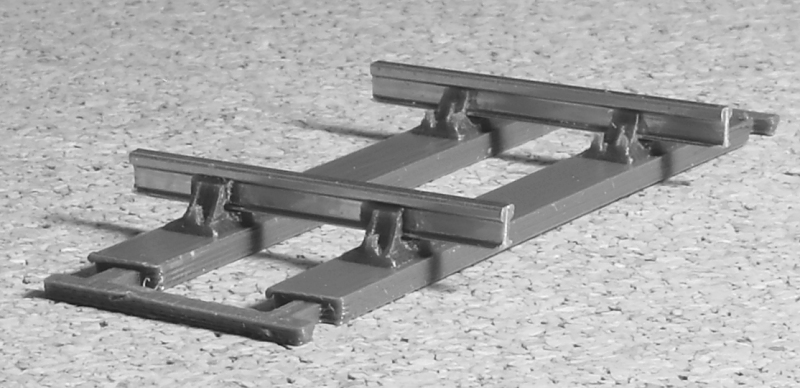
• For practical computer reasons it is not possible to generate in model form all the fillet and blend curves and radii found in a typical chair casting. It would require a massive amount of computer memory to store such data for the hundreds of chairs on a typical track plan, causing the screen response to become extremely sluggish on most home computer systems. The chair designs are therefore simplified to a basic geometrical representation of the prototype.
• The model chairs are intended for 3D printing. This imposes some constraints on the practical design of the chair to ensure trouble-free printing results.
Before I can think of any non-REA chairs, such as the GWR chairs, I have to finish the full range of REA chairs including for K-crossings and the slab & bracket designs. So it is going to be some time before it will be possible to represent all prototype variants. There are also some folks hoping for flat-bottom rail fixings, so that is another challenge awaiting me.
")
*REA = Railway Engineers Association
cheers,
Martin.
 Search
 Thanks.